Tired of static menus in Elementor that limit your site’s flexibility? It’s frustrating when you want dynamic, customizable navigation but end up stuck with repetitive, manual edits.
This not only eats up your time but also makes site updates a headache. Fortunately, using the Repeater control in Elementor allows you to easily create dynamic, fully customizable menus, no advanced coding required.
In this blog, you’ll discover exactly how to build a flexible menu with the Elementor Repeater, step by step.
Prerequisites
Before you begin, make sure you have The Plus Addons for Elementor installed and activated. You’ll also need a header template, which you can create using either the free Nexter Builder or Elementor Pro.
How to Create a Menu With Repeater in Elementor [Step-by-Step]
1. Add the Navigation Menu Widget
Start by adding the Navigation Menu widget from The Plus Addons to your header template in Elementor.
2. Set Up the Top-Level Menu

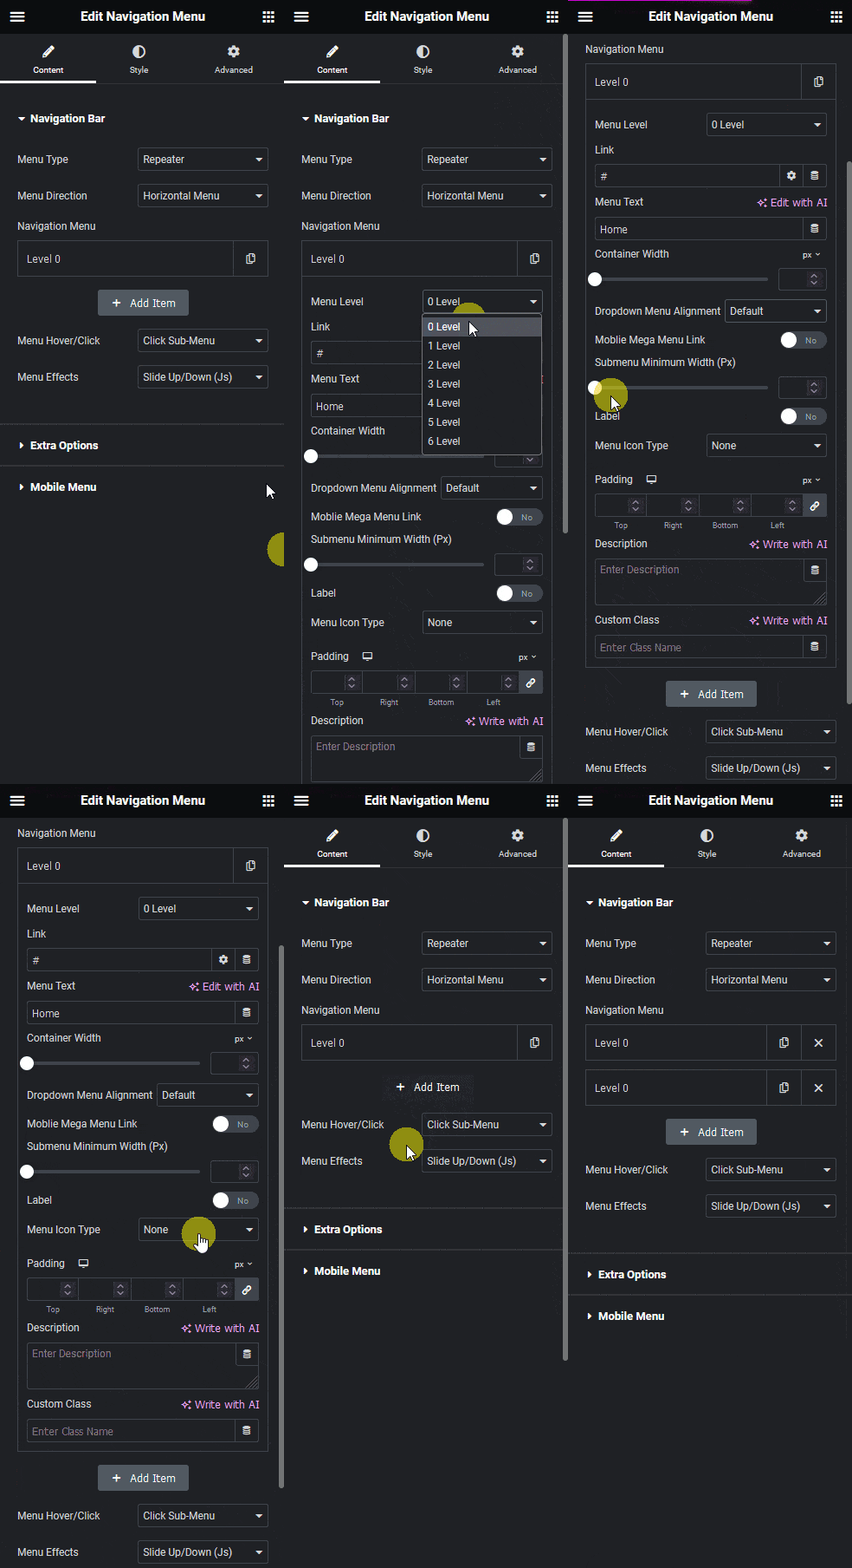
- Menu Type: Select Repeater from the Menu Type dropdown.
- Menu Direction: Choose the direction that best fits your design.
- Under the Navigation Menu section, you’ll see an item. Open it to configure.
Configure Each Top-Level Menu Item:
- Menu Level: Set this to 0 Level for all main menu items.
- Link: Enter the URL for the menu item.
- Menu Text: Add the label for your menu item.
- Dropdown Menu Alignment: Choose how the dropdown aligns (if applicable).
- Label: Optionally, add a custom label and style it.
- Menu Icon Type: Add an icon or image if you wish.
- Padding: Adjust the spacing around the menu item.
- Description: Add a brief description for extra context.
- Custom Class: Assign a custom CSS class for advanced styling.
Note: Options like Container Width, Mobile Mega Menu Link, and Submenu Minimum Width are only available for submenu items, not top-level items.
- Click + Add Item to add more top-level menu items, ensuring each is set to 0 Level.
3. Add Submenus
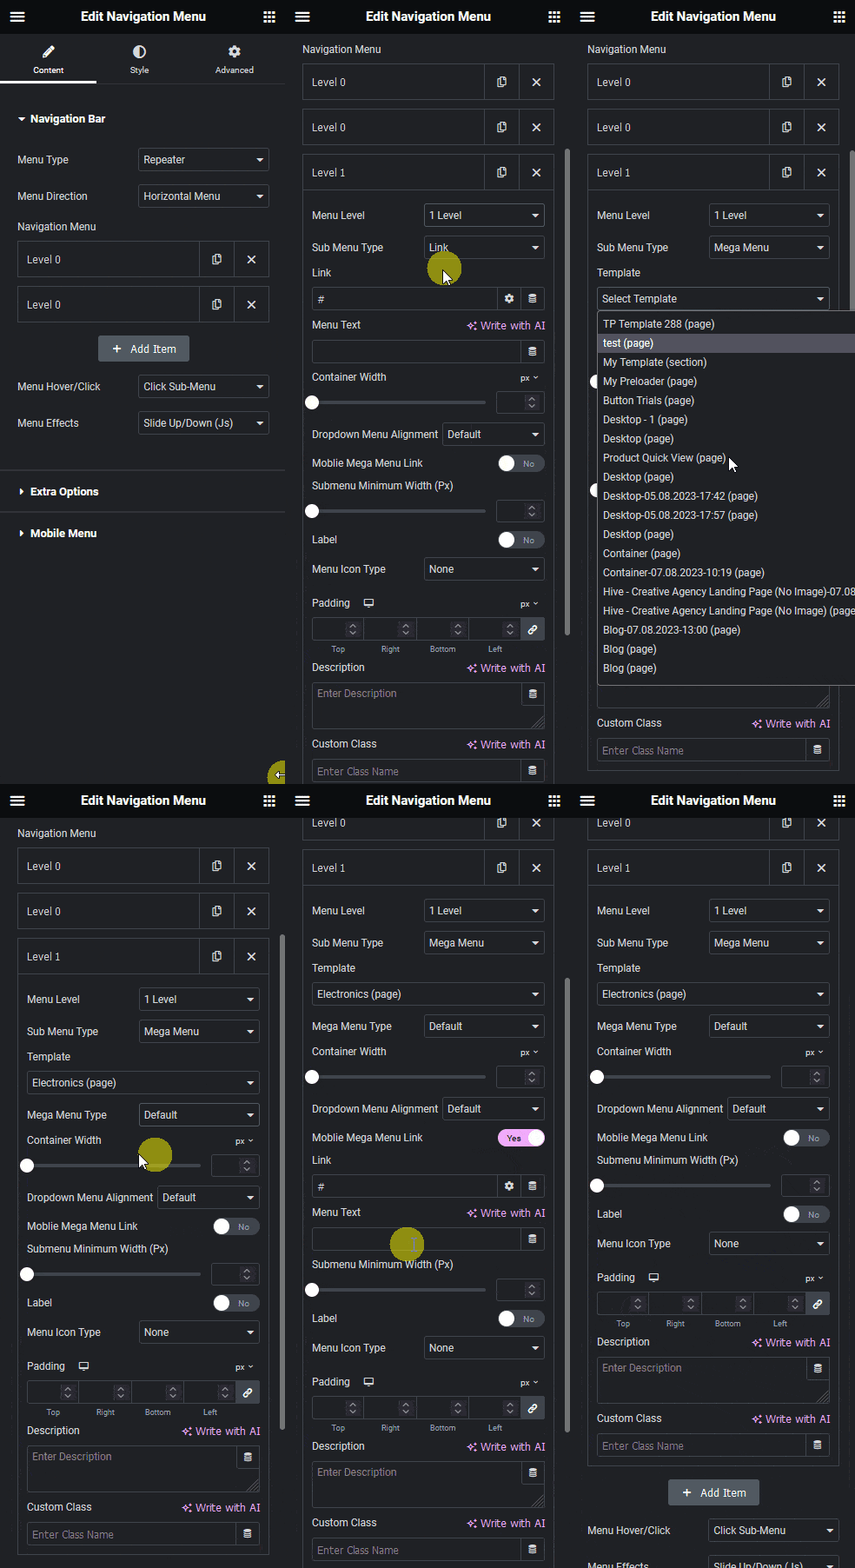
- To add a submenu, click + Add Item again.

- Open the new item and set Menu Level to 1 Level (or higher for deeper nesting).
- Place submenu items directly below their parent menu item for proper dropdown structure.
Submenu Configuration:
- Sub Menu Type: Choose between Link (standard dropdown) or Mega Menu (for larger, template-based menus).
- If you select Link, configure as you did for top-level items.
- If you select Mega Menu, pick an Elementor template, and set the container width (default, container, or full width). You can also adjust custom width and alignment.
- If you select Link, configure as you did for top-level items.
- Mobile Mega Menu Link: Enable this to add a link and text for mobile users.
- Submenu Minimum Width: Set the minimum width for the submenu when using the Link type.
You can continue adding more submenu items, increasing the Menu Level as needed for multi-level dropdowns.
Wrapping Up
Creating a dynamic, customizable menu in Elementor is simple with the Repeater option in The Plus Addons Navigation Menu widget.
By following these steps, you can easily build both standard and mega menus, organize multi-level navigation, and style each item to match your site’s design, no coding required.
This approach not only saves you time but also gives you the flexibility to update and expand your menu as your site grows.

