If you want to elevate your website’s navigation, creating a mega menu in Elementor is the perfect solution.
Mega menus offer a spacious, visually organized layout that displays multiple categories, images, and links all at once, making it easier for visitors to find exactly what they need quickly.
Unlike traditional menus, mega menus reduce clicks and scrolling, enhancing user experience and engagement.
In this blog, you’ll learn how to build a fully customizable, content-rich mega menu using Elementor’s intuitive tools.
How to Create a Mega Menu in Elementor [Step-by-Step]
Step 1: Prepare Your Tools
To get started, ensure you have The Plus Addons for Elementor installed and activated on your website. This powerful toolkit includes the Navigation Menu widget, which makes creating a mega menu a breeze.
Step 2: Create Elementor Templates for Each Mega Menu Item
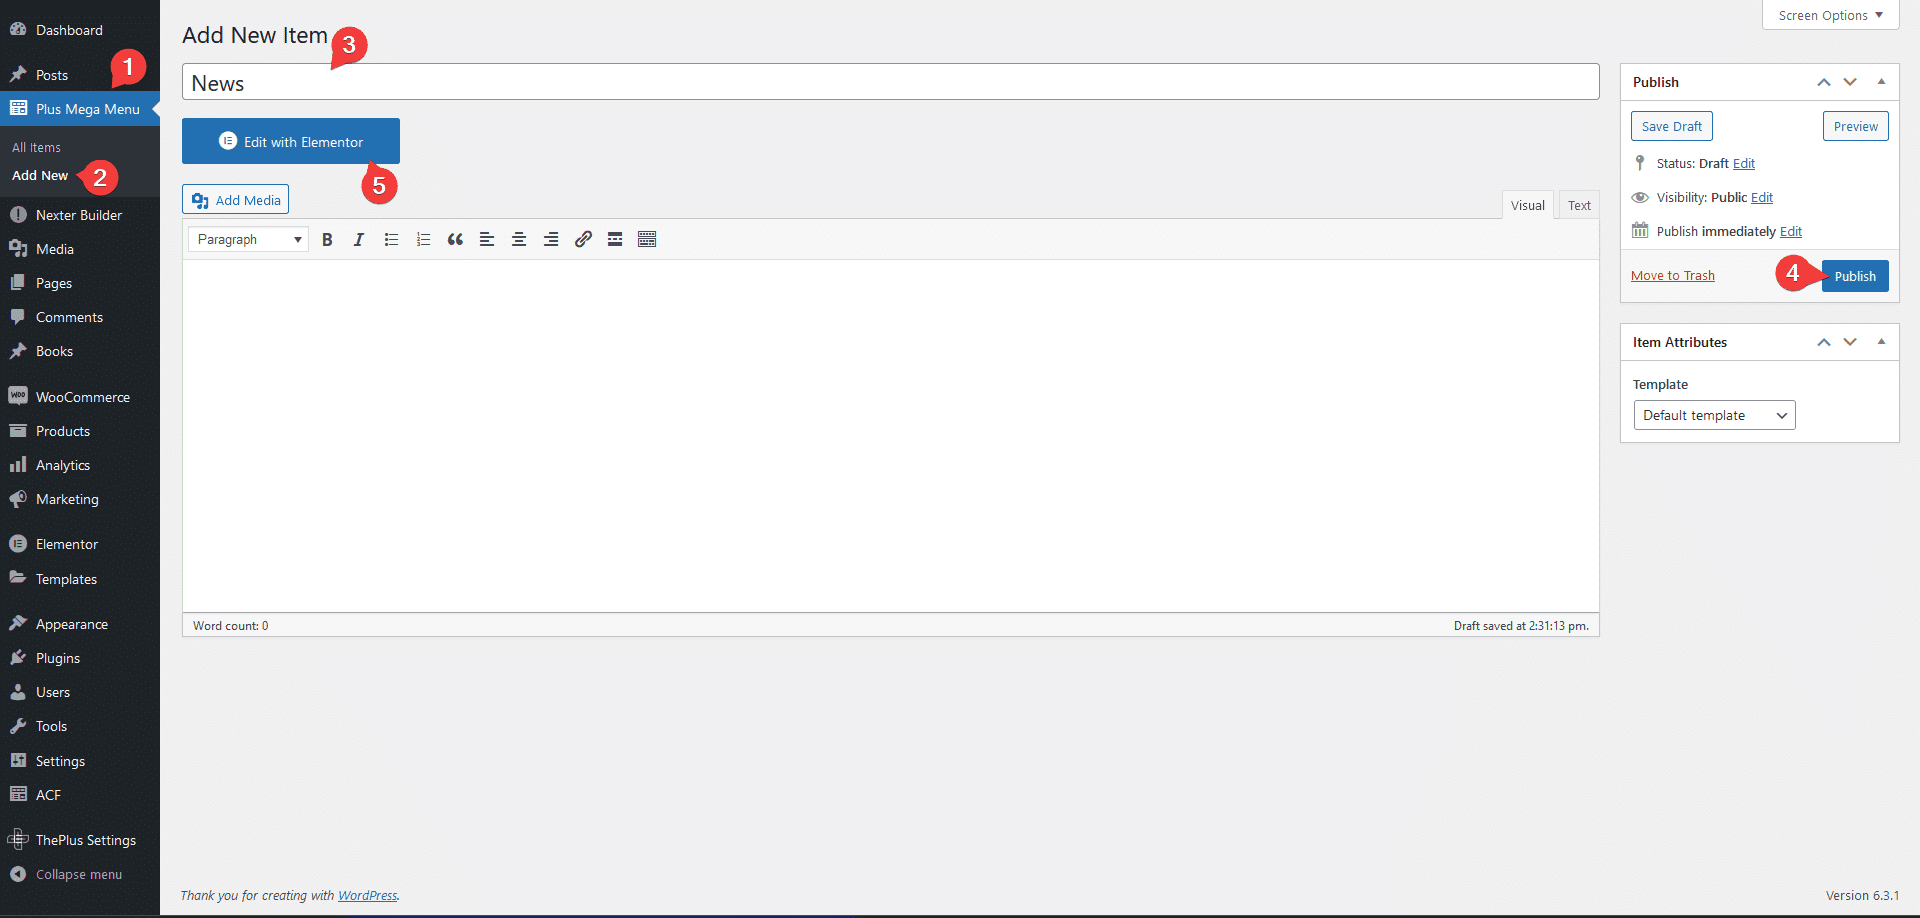
- Access Plus Mega Menu: In your WordPress dashboard, go to Plus Mega Menu > Add New.
- Add and Edit Template: Give your template a name and click Publish. Next, select Edit with Elementor to design your mega menu section using any Elementor widgets you like. Once finished, click Update.
- Repeat as Needed: Create separate templates for each top-level item you want in your mega menu.
Tip: If you encounter an error in the Elementor editor like this:
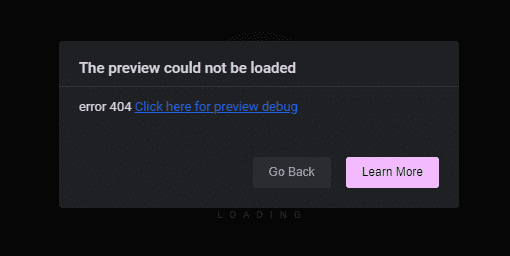
Don’t worry. Reset your permalinks by going to Settings > Permalinks, selecting Plain, saving, then reverting to your previous structure and saving again.
Step 3: Build Your WordPress Menu
- Go to Appearance > Menus: Click create a new menu, name it, and hit Create Menu.
- Enable Mega Menu Items: At the top, click Screen Options and check Plus Mega Menu. Your Elementor templates will now appear under the Plus Mega Menu tab.
- Add Mega Menu Items: Select your templates and click Add to Menu.
- Organize with Parent Items: For each mega menu, add a parent item using the Custom Links option. This keeps mega menus closed by default.
- Customize Appearance:
- Label Color/Background: Set custom label and background colors.
- Icon Type: Add icons or images.
- Mega Menu Type: Choose between default, container, or full width for each menu item.
- Label Color/Background: Set custom label and background colors.
- Save Your Menu: Once organized and customized, click Save Menu.
Step 4: Add the Mega Menu to Your Header
- Edit Your Header Template: Use either Nexter Builder (free) or Elementor Pro to edit your site’s header.
- Insert Navigation Menu Widget: Drag the Navigation Menu widget into your header.
- Configure Menu Settings:
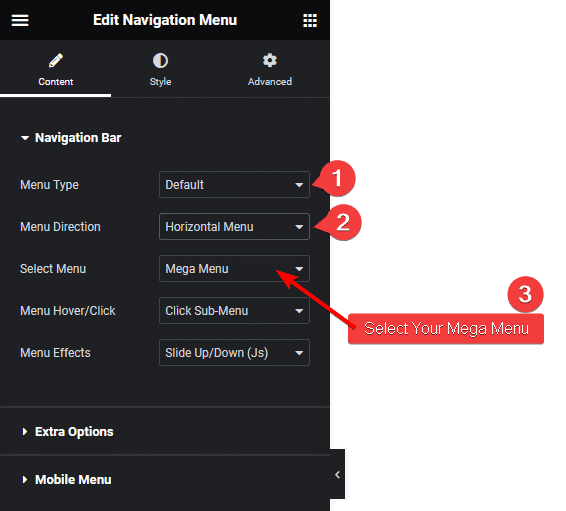
- Set Menu Type to Default.
- Choose Menu Direction (e.g., Horizontal Menu).
- Select your newly created mega menu from the dropdown.
- Adjust Submenu Effects: Choose how submenus appear on hover for added interactivity.
And that’s it! Your site now features a beautiful, fully functional mega menu.

Wrapping Up
Creating a mega menu in Elementor is a game-changer for websites with extensive content or e-commerce stores.
With The Plus Addons for Elementor, you can design visually appealing, organized, and user-friendly navigation in just a few steps.
By following this guide, you’ll enhance your visitors’ browsing experience and keep them engaged with your site’s content.