Creating a website with one page navigation can make your site easier to use and more attractive.
This design keeps everything on a single page, allowing visitors to find information quickly without clicking through multiple pages.
If you want to give your users a smooth and simple browsing experience, one page navigation might be a good choice.
It works well with clean, modern designs and helps keep your content organized and accessible.
Let us guide you through understanding how to create one page navigation in Elementor and apply it to your website.
Key Takeaways
- One page navigation keeps all content on a single page for easy browsing.
- This design improves user experience with smooth and simple navigation.
- Building a single page site involves clear steps and helpful tools.
What is One Page Navigation?
One-page navigation, also known as single-page navigation, is a website layout style where all the site’s content is displayed on a single page. Instead of navigating to different URLs, users simply scroll down to access various sections.
Unlike traditional multi-page websites, where each page has its own address and separate content, a one-page site combines everything into one seamless, continuous scroll.
This type of navigation prevents users from feeling overwhelmed by too much content at once.
It helps you build a smooth, step-by-step layout that presents small chunks of information in each section, leading visitors naturally toward the call-to-action (CTA) at the bottom.
Here’s a sample of how a one-page website using Elementor one-page navigation might look:
The one-page navigation shown above was built using The Plus Addons for Elementor. As displayed, the webpage contains multiple sections along with a vertical one-page menu positioned on the left side.
This menu features icons representing different sections of the page, and when hovered over, each icon reveals the section’s name.
Users can navigate the site either by clicking on the icons in the menu or by simply scrolling through the various sections.
When to Use One Page Navigation for Your Website?
Single page navigation looks simple and elegant, but you must carefully consider the nature of your business, your website’s content, and user behavior and preferences before adding it to your website.
Here are some instances where one page navigation works best on a website:
1. Small Business
A one-page navigation website is ideal for small businesses that offer just a few products or services. If you run a salon, restaurant, or photography studio, you don’t need a complex multi-page website.
You can display all essential information, such as contact details, testimonials, and product or service descriptions on a single page. This setup not only simplifies navigation but also gives your site a cleaner and more elegant look.
2. Promotional Website
Brands often build temporary websites, known as microsites, to support advertising campaigns or promote upcoming products.
In these cases, you can organize all the promotional content into individual sections and use a one-page navigation menu to guide visitors smoothly through the content.
3. Creative Portfolios
One-page navigation works especially well for websites that focus on visual content.
If you need to showcase a portfolio of photographs, artwork, or any type of media, a single-page website with one-page navigation allows you to present your work in a clean, organized, and visually engaging way.
4. Fast Loading Website
Another great reason to use one-page navigation is to improve website loading speed.
As mentioned earlier, single-page websites display all content in separate sections on the same page, instead of loading multiple pages.
This setup reduces the number of HTTP requests, which helps your website load faster and enhances the overall user experience.
5. Mobile-First Website
Vertical scrolling or swiping comes naturally to smartphone users.
If your audience primarily accesses your site via mobile devices, designing it as a single-page layout with one-page navigation can create a smoother, more intuitive browsing experience.
How to Build a Single Page Website with One Page Navigation in Elementor
Now, let’s walk through the steps to create a single-page website using Elementor’s one-page navigation feature:
Step 1. Add Elementor Page Builder to Your Site
Start by adding the Elementor plugin to your WordPress site.
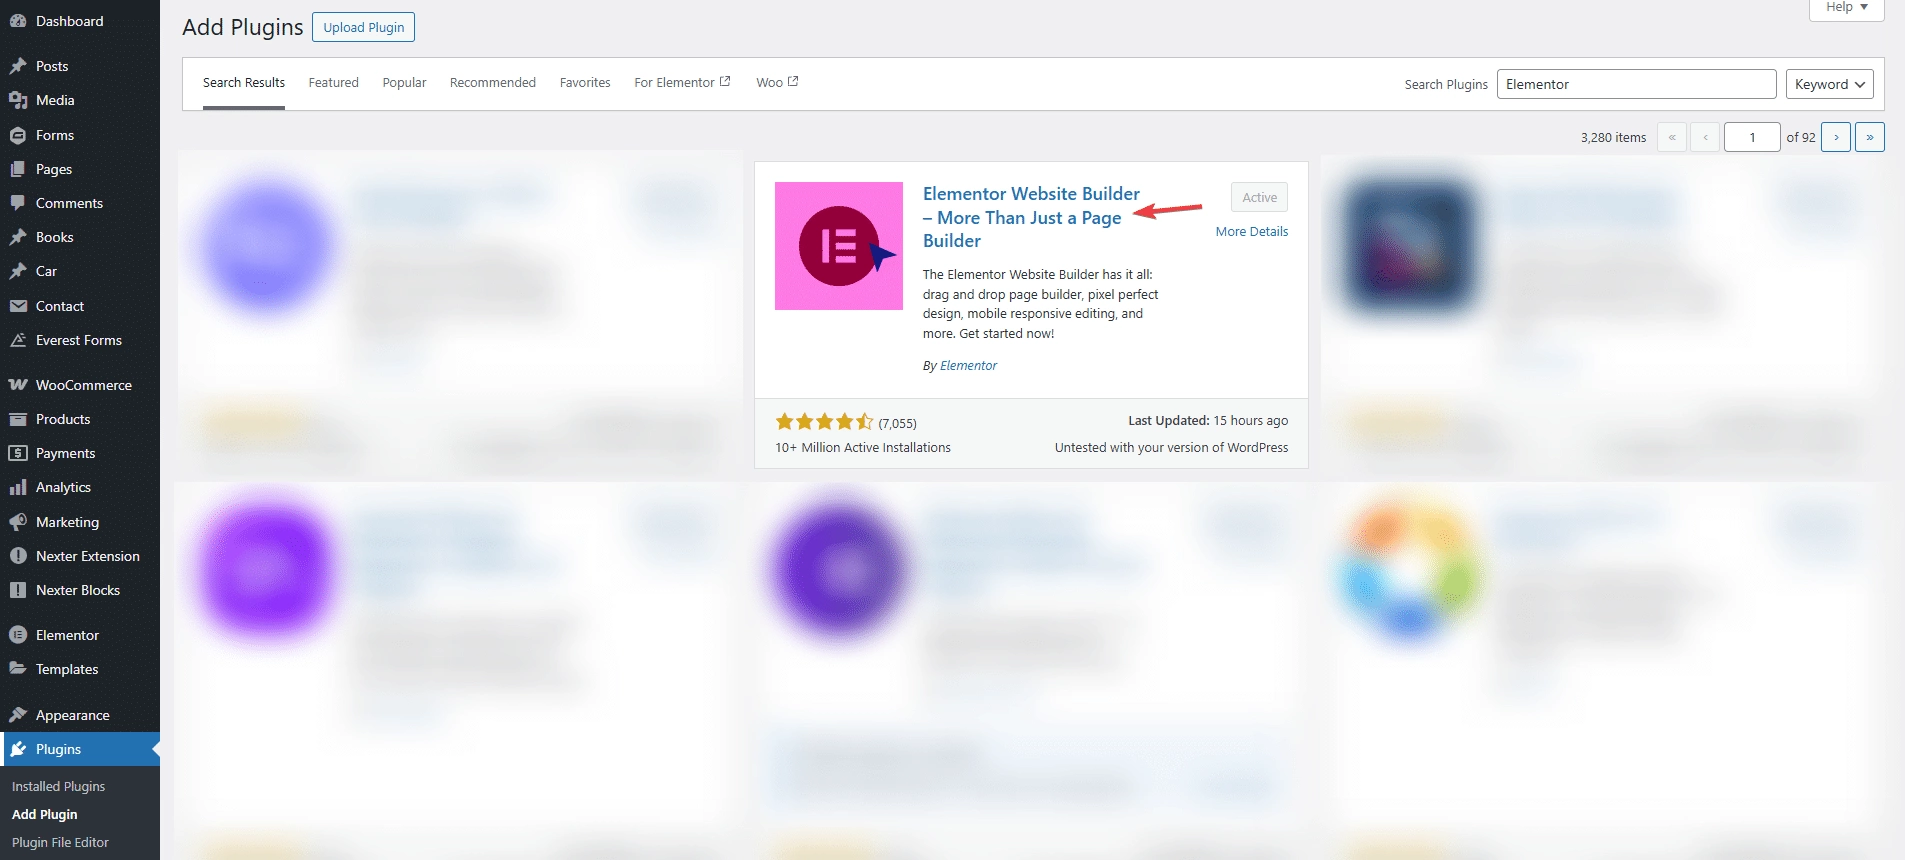
From your dashboard, go to Plugins > Add Plugin.
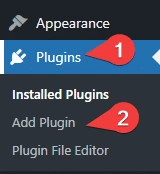
Search for “Elementor” Click Install and then Activate to enable it on your site.
If you already have Elementor installed, you can continue to the next step.
Step 2. Add The Plus Addons for Elementor
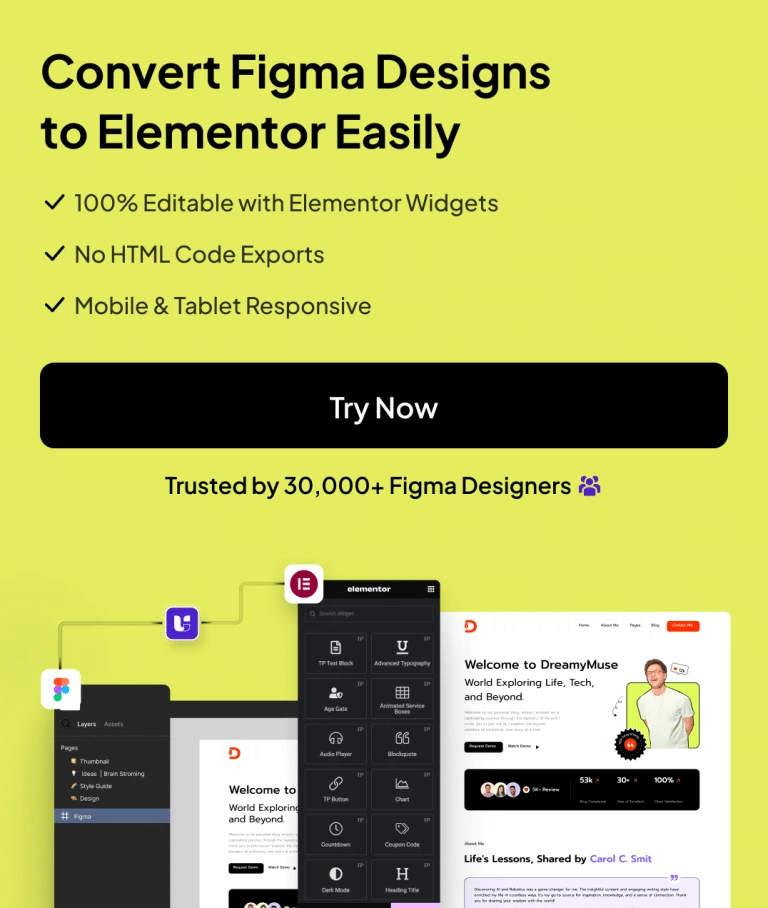
Elementor supports the use of powerful addons that enhance your website with advanced features—one of which is the One Page Navigation widget.
In this guide, we’ll be using The Plus Addons for Elementor, a feature-rich plugin that includes the One Page Navigation widget along with 120+ additional Elementor widgets.
The Plus Addons is a freemium plugin, meaning it offers both free and premium features. To begin, you’ll need to install the base (free) version from the WordPress repository before activating the pro version.
To install it:
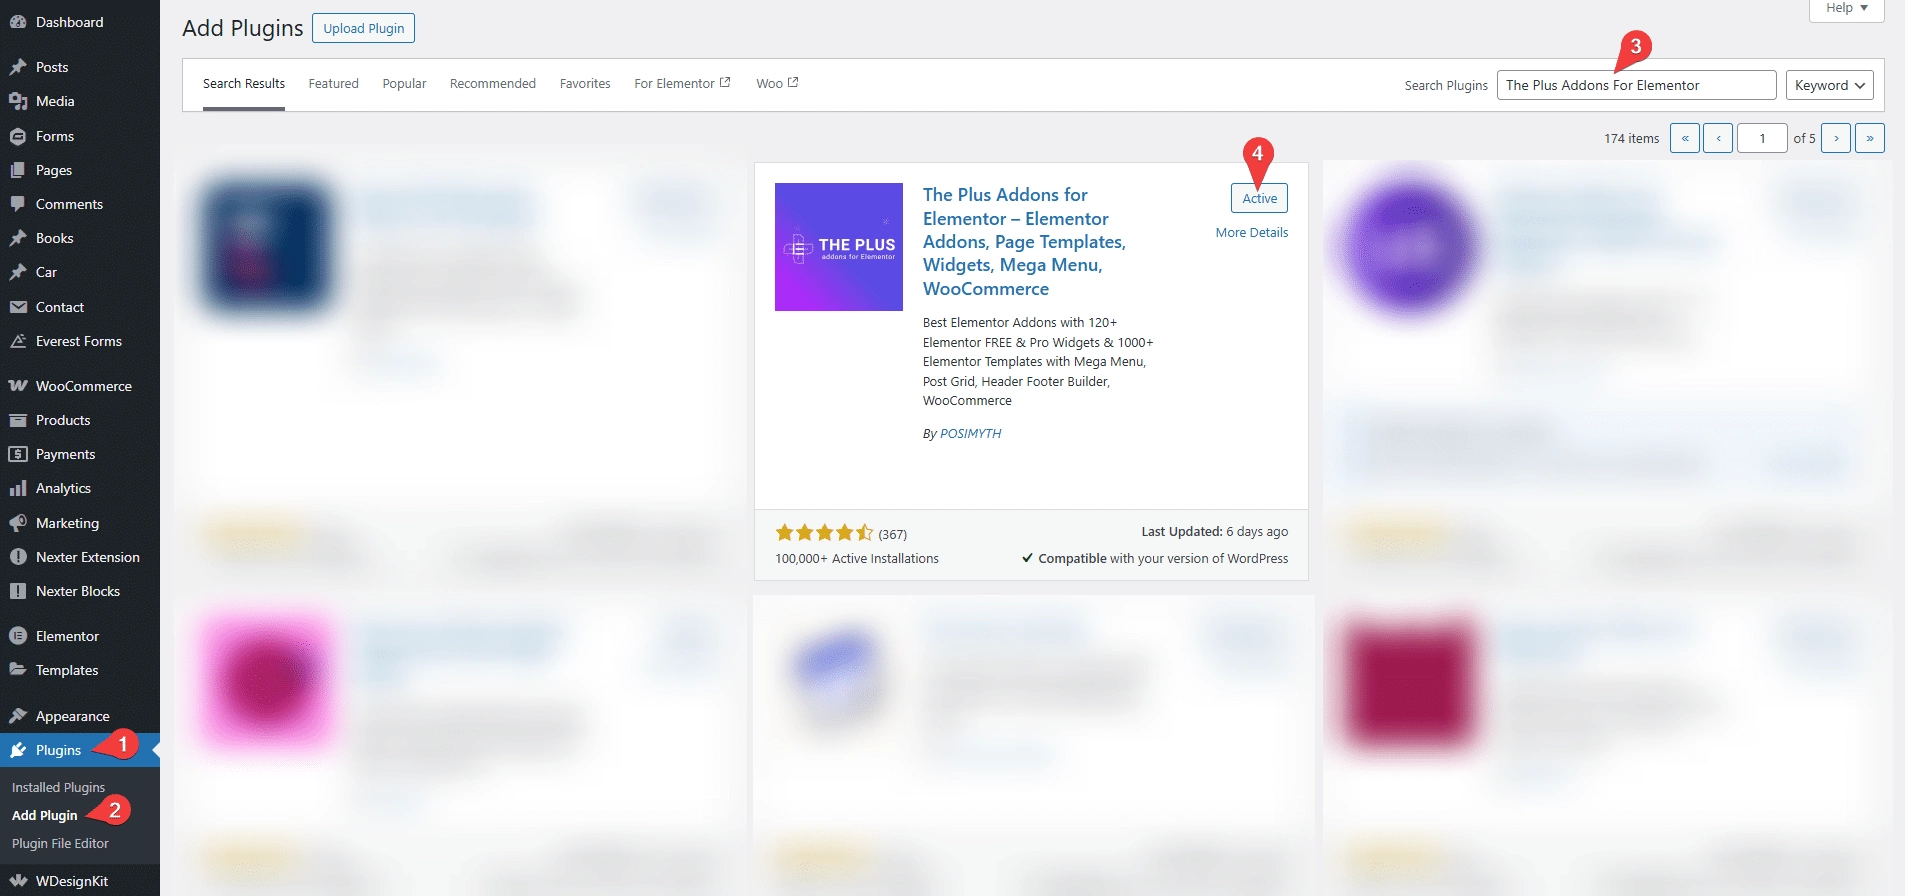
- Go to your WordPress Dashboard
- Click on Plugins > Add Plugin
- Search for “The Plus Addons for Elementor”
- Install and activate the plugin
This will enable the free version, which includes over 35 Elementor widgets to get you started.
To access the premium version of the addon, select a pricing plan that suits your needs.
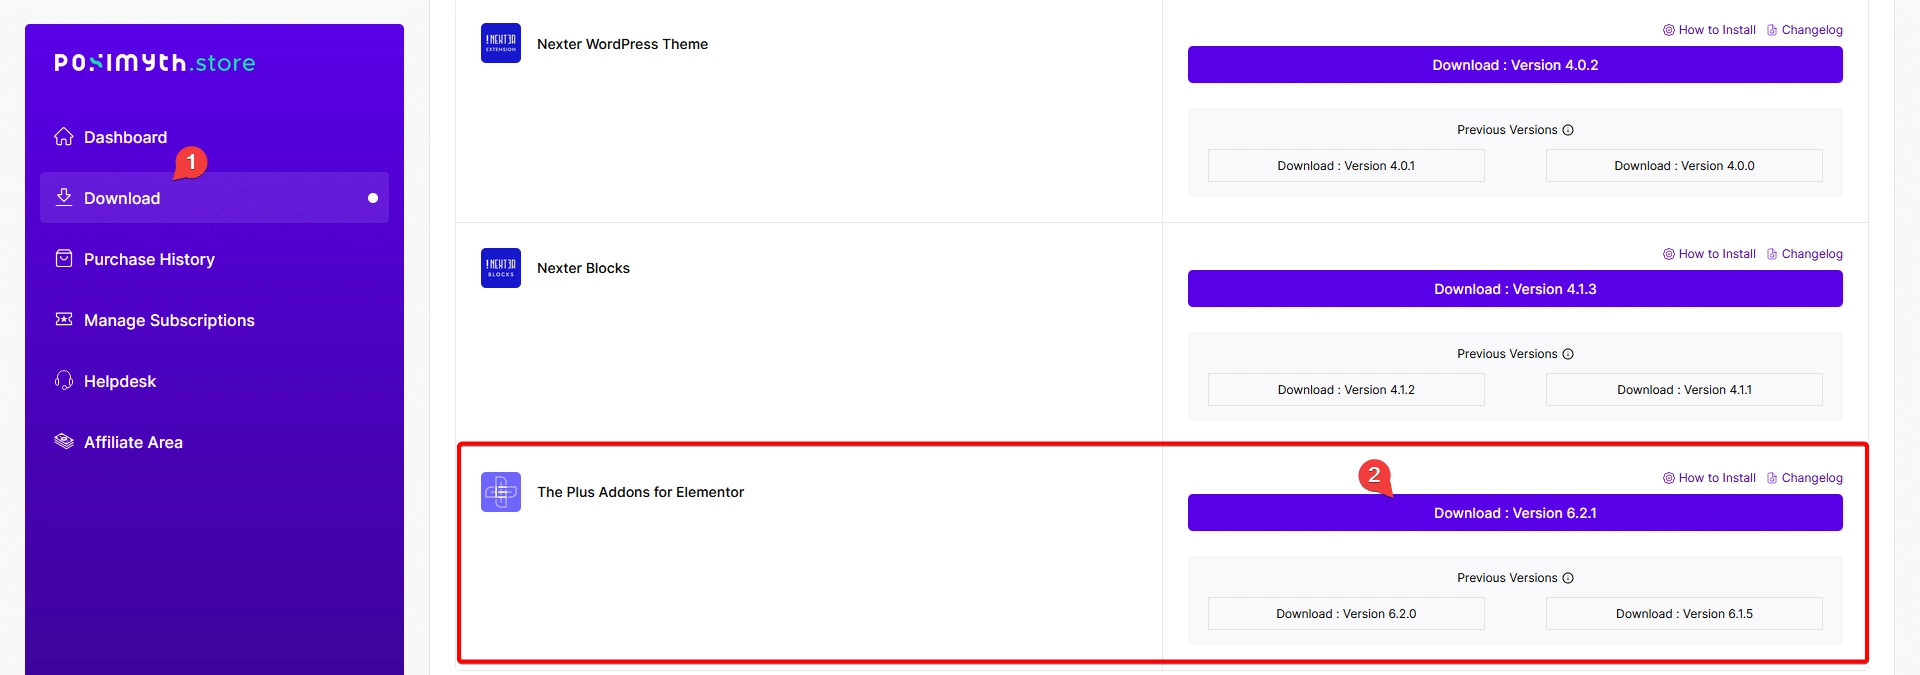
Next, visit the POSIMYTH Store and log in to your account. Once logged in, you’ll gain access to 120+ Elementor widgets and 300+ pre-designed UI blocks.
From your POSIMYTH account dashboard, click on the Download button to download the ZIP file for The Plus Addons for Elementor Pro.
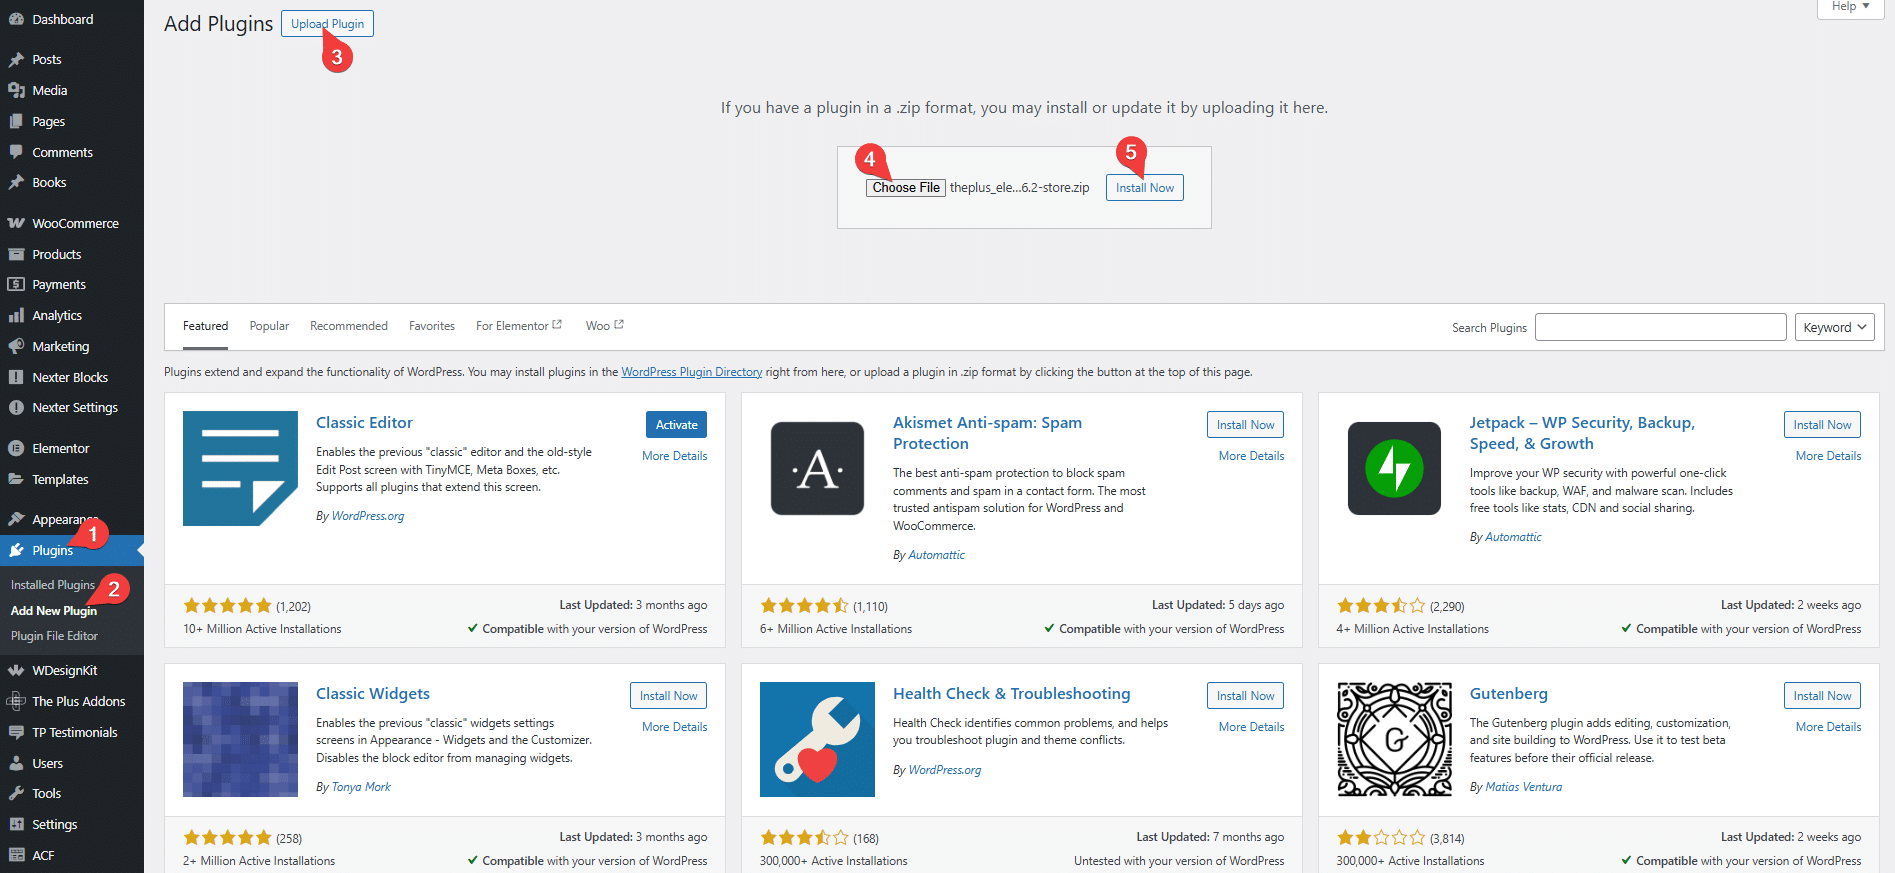
Now, return to your WordPress Dashboard and go to Plugins > Add New.
Click on Upload Plugin, then select the ZIP file you downloaded earlier.
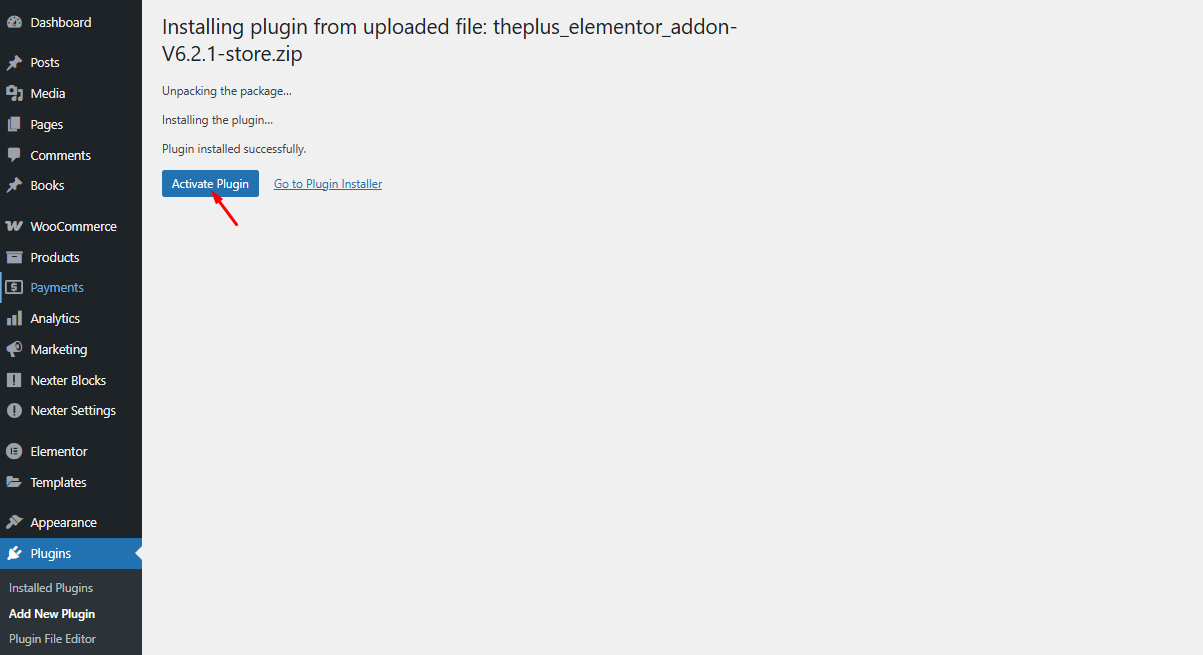
Click Install Now to begin the installation process.
Click on “Activate Plugin” to start using The Plus Addons for Elementor Pro.
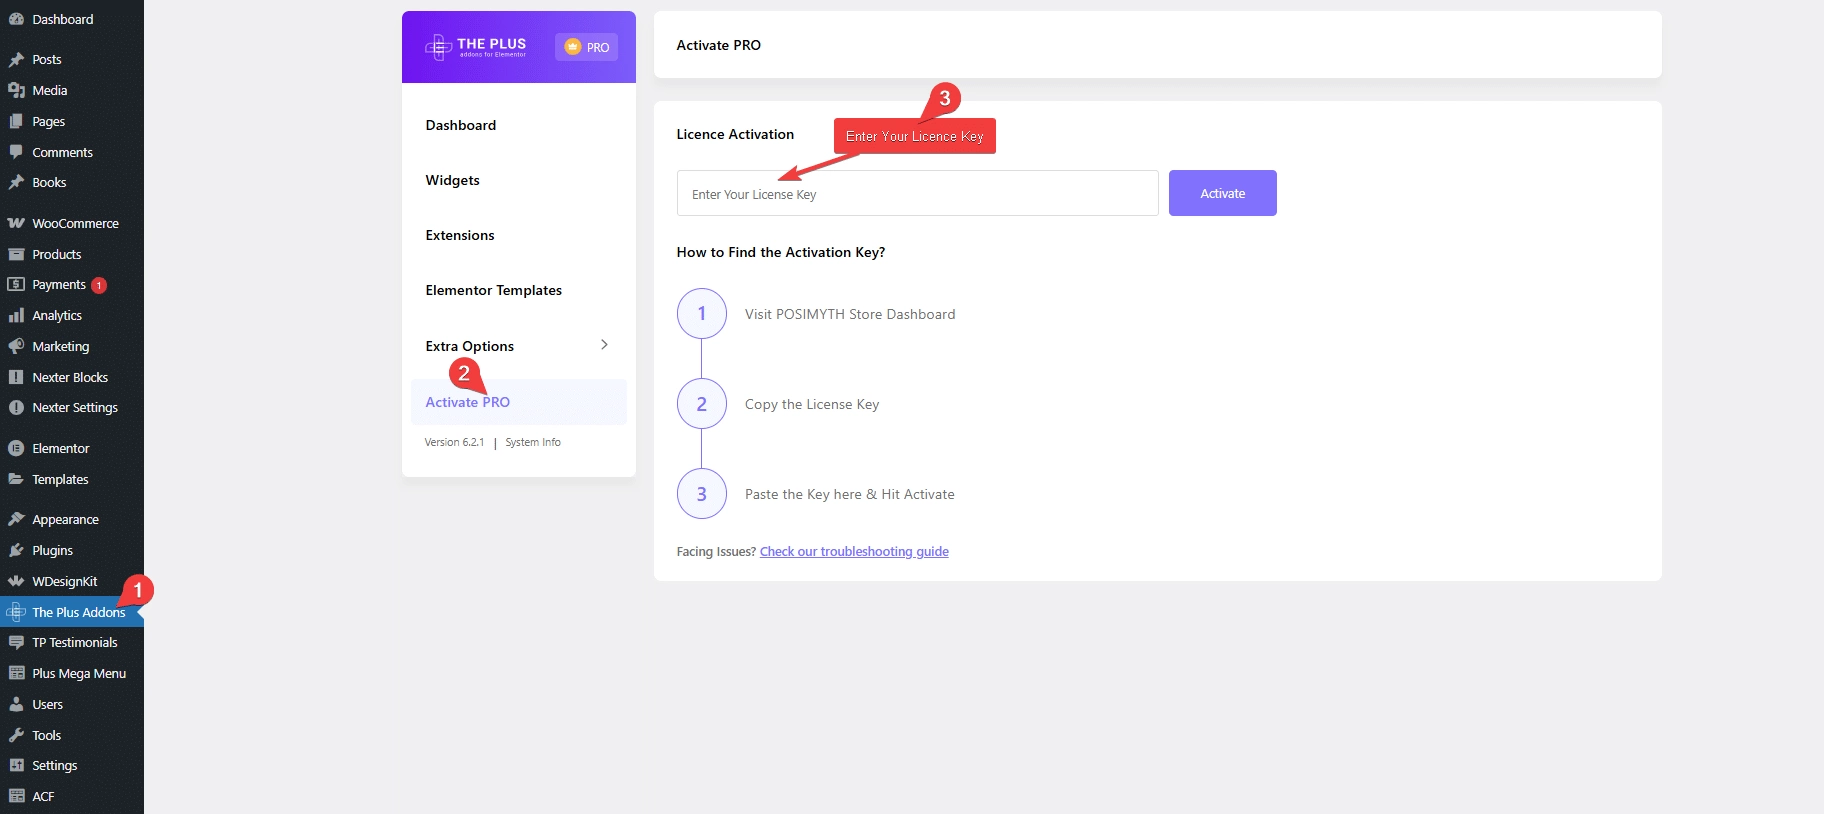
To activate your The Plus Addons Pro license, log in to your POSIMYTH Store account and copy the license key from your dashboard.
Then, return to your WordPress Dashboard, go to The Plus Addons > Settings, paste the key into the License Activation field, and click Activate.
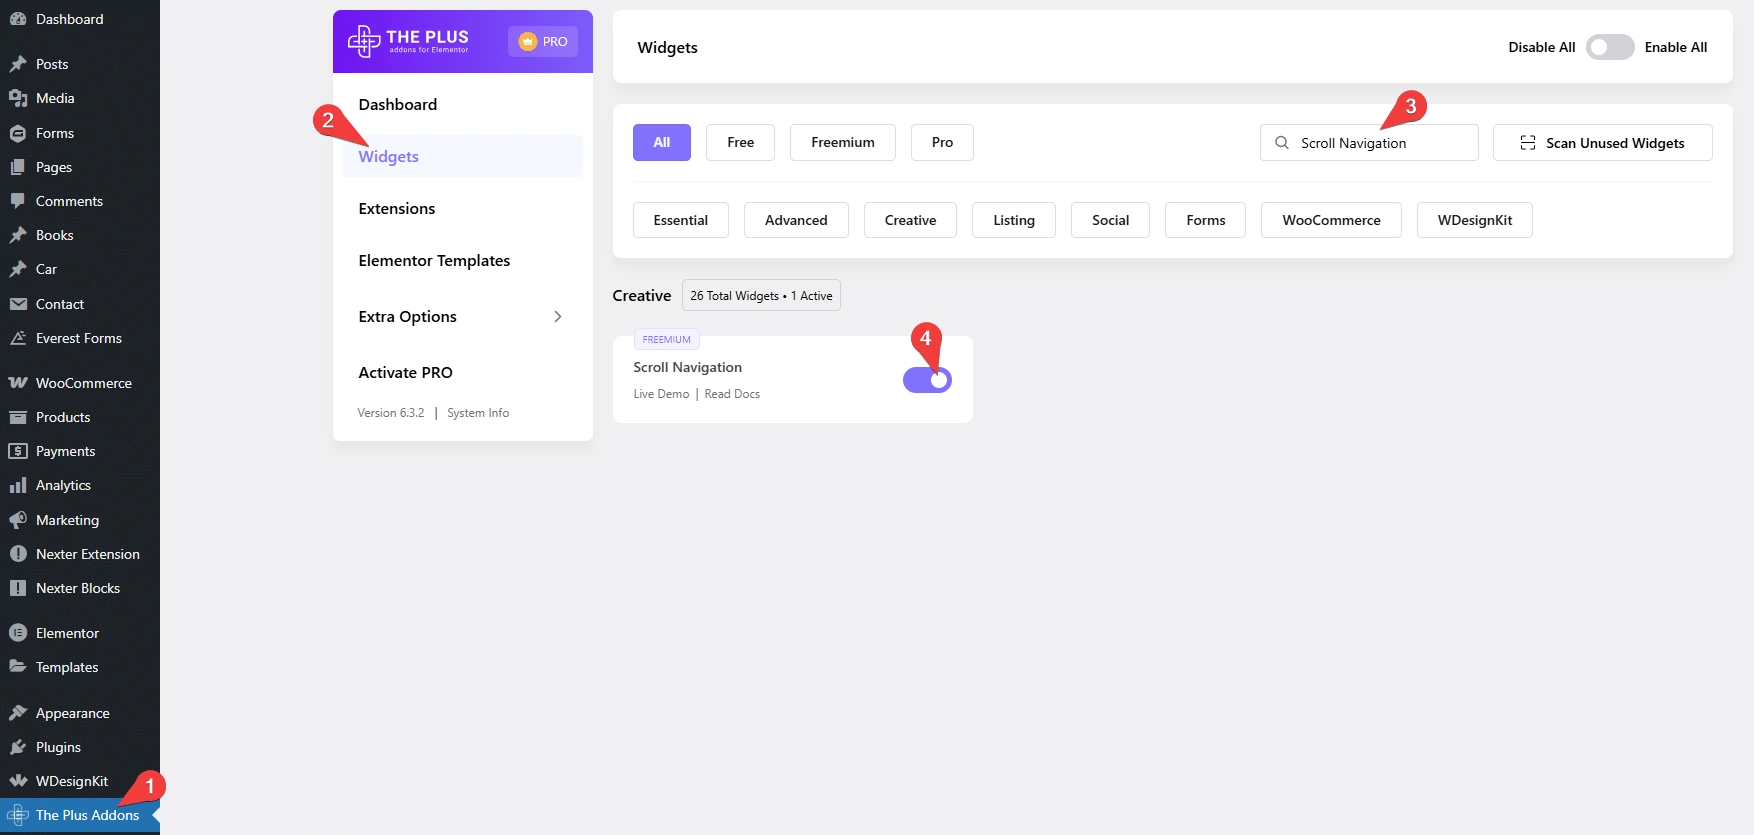
Step 3. Turn On One Page Scroll Navigation
Open the WordPress dashboard and find The Plus Addons.
Go to the Widgets tab and search for “Scroll Navigation.” Enable this widget by toggling the switch and save your changes.
Step 4. Create Your Web Page Layout
Once you’ve enabled the Scroll Navigation widget from The Plus Addons settings, you can start using it on your website.
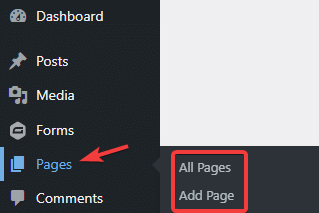
To add a new page, go to Pages > Add Page.
If you want to edit an existing page, navigate to Pages > All Pages, then select the page you want to modify.
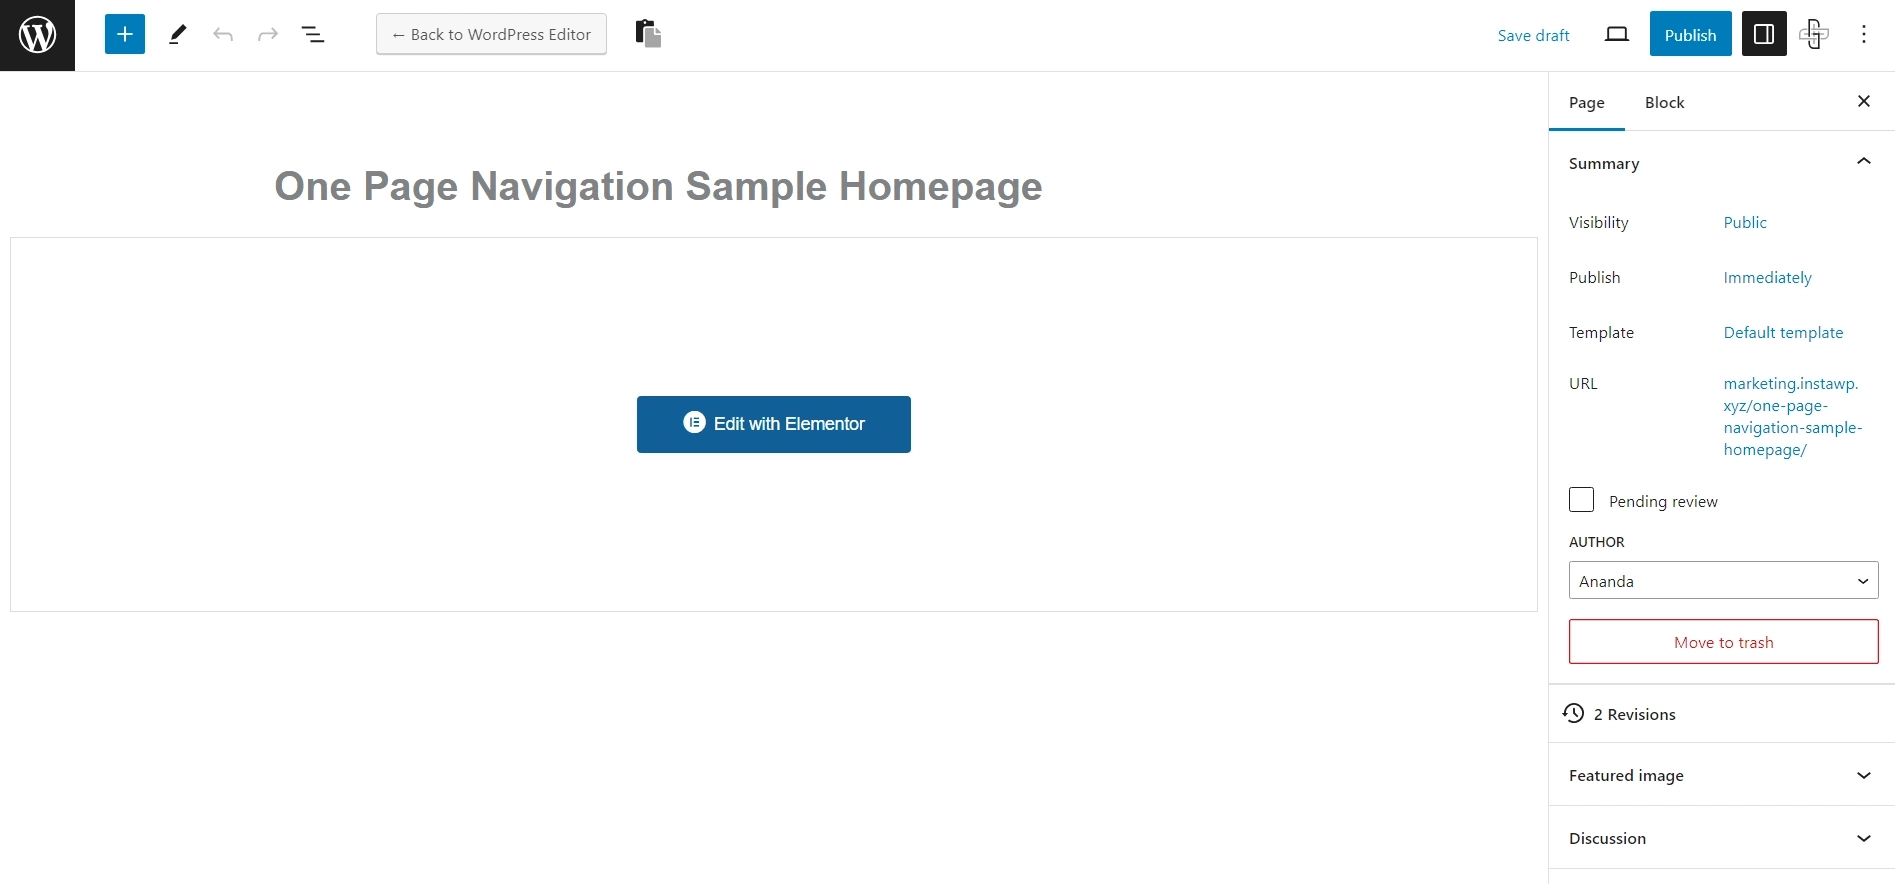
When you add a new page, it will open in the default Gutenberg editor.
However, we’ll click on “Edit with Elementor” to design the page using the Elementor page builder.
For this guide, we’ll use an Elementor template that includes sections such as Pricing, FAQs, Reviews, Call-to-Action, and more.
Based on your requirements, you can also create a fully custom web page and add as many sections as needed.
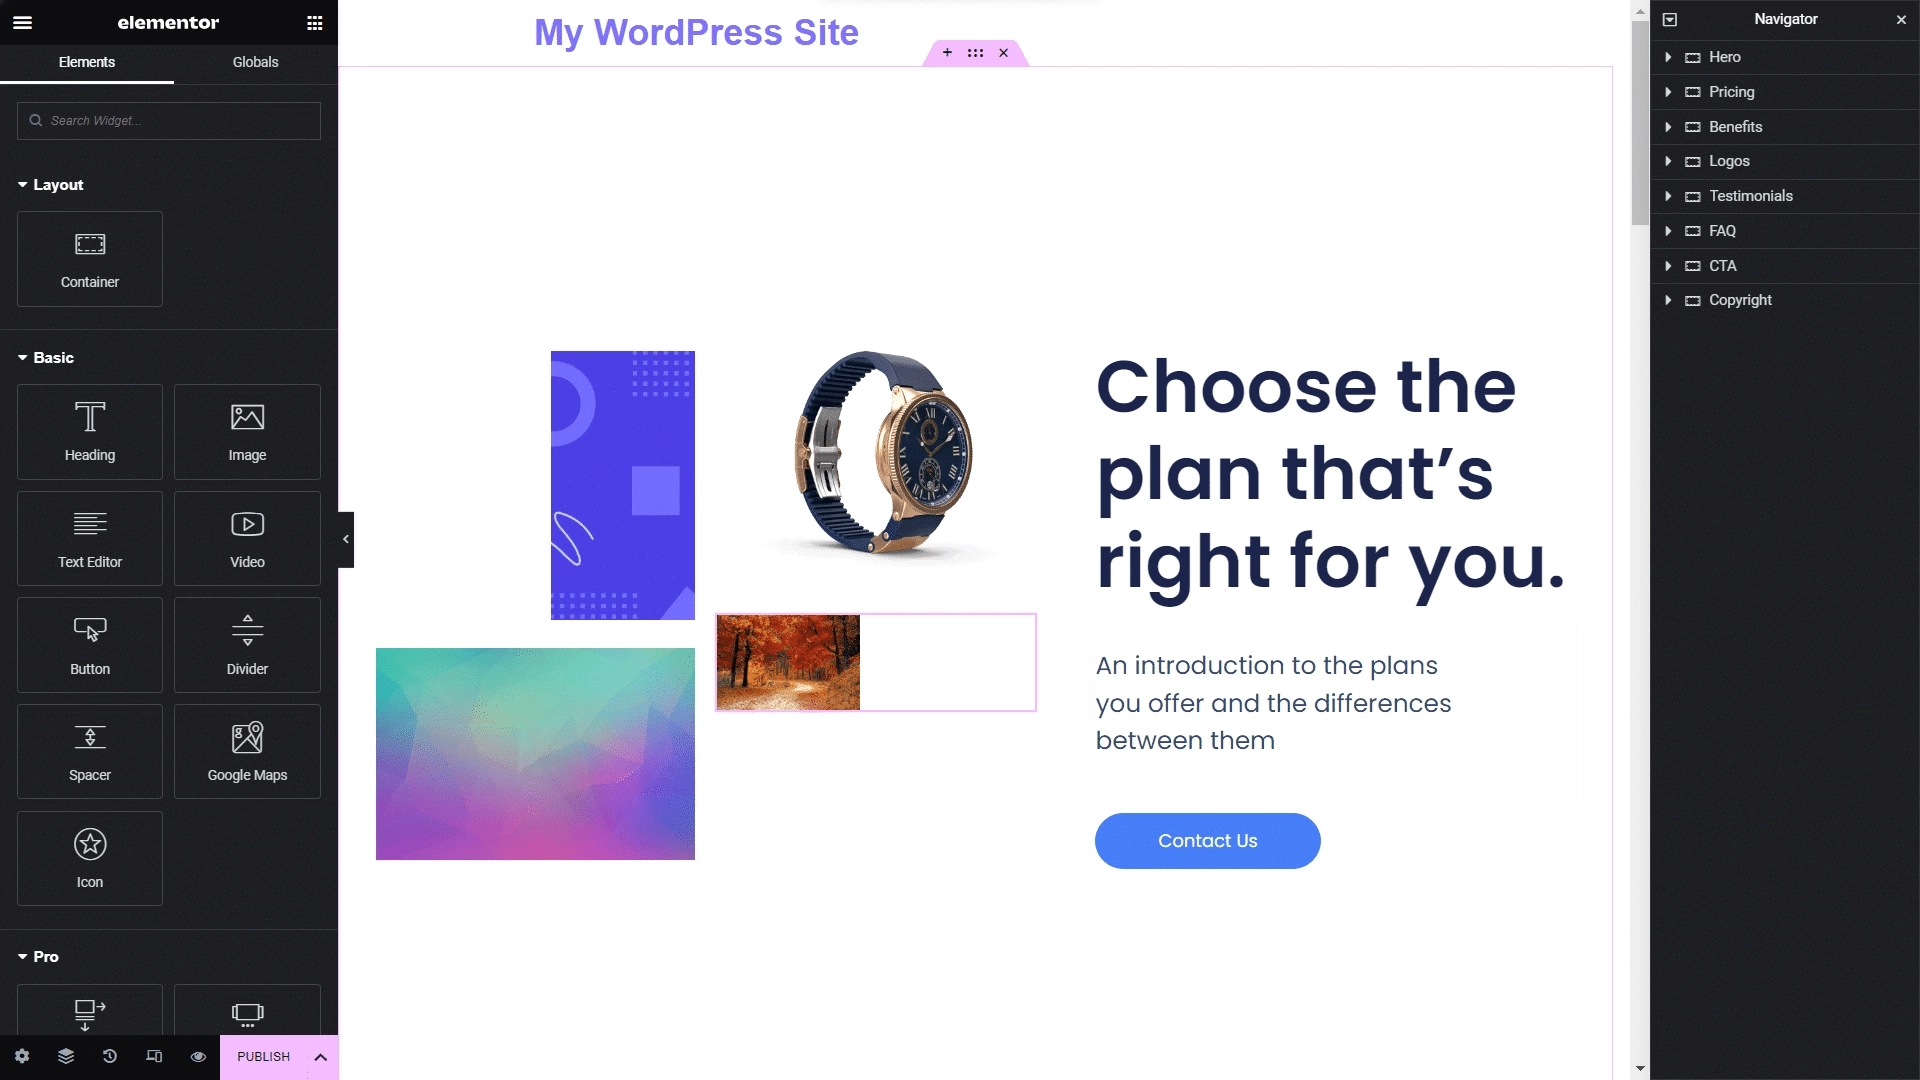
Click on a section to open its settings in Elementor’s side panel.
Then, go to the Advanced tab, find the CSS ID field, and assign a unique ID to that section.
A CSS ID must be a single word without spaces or special characters.
Assign a CSS ID to each section on your page, and make sure to remember these IDs they are essential for creating a working one-page navigation menu.
Step 5. Insert the One Page Navigation Widget
Now that your web page is ready, you can add the one-page navigation feature using the Scroll Navigation widget from The Plus Addons for Elementor.
To do this, find the Scroll Navigation widget in the Elementor side panel, then drag and drop it onto your page.
Select the Scroll Navigation widget to open its settings in the Elementor panel.
Under the Content tab, click the + Add Item button and add as many items as there are sections on your web page.
This will create a navigation menu with buttons linked to each section.
Click on Item #1 and find the Section ID field.
Enter the CSS ID of the first section into this field.
This links the navigation button for Item #1 to its corresponding section on the page.
Similarly, select the other items and link each to its respective section using the corresponding CSS IDs.
Once completed, the navigation buttons will become clickable.
You can now click these buttons to jump to their linked sections. Additionally, the buttons will highlight to indicate the section the user is currently viewing.
Step 6: Customize Your Design
Now that the scroll navigation menu is added, you can style it to match your website’s look and feel.
Select the Scroll Navigation widget, then adjust the settings and toggle options according to your preferences.
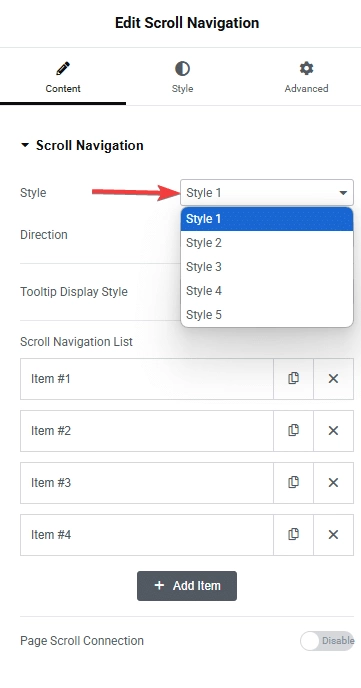
A. Choose Your Navigation Menu Style
The Plus Addons for Elementor offers five unique styles for scroll navigation. Simply select your preferred style from the Style dropdown menu in the Content tab.
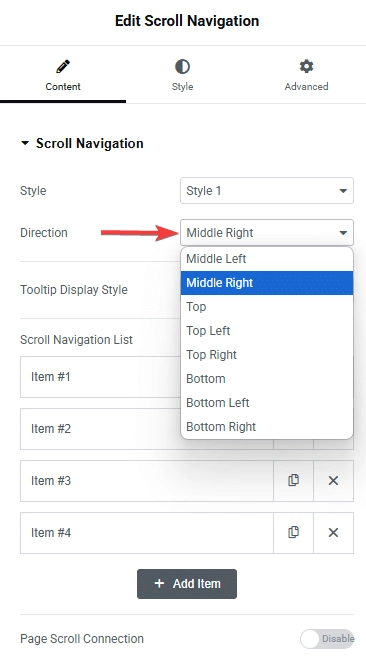
B. Align Your Scroll Menu
You can position the scroll menu on any side or corner of your webpage. Choose your preferred alignment from the Direction dropdown menu.
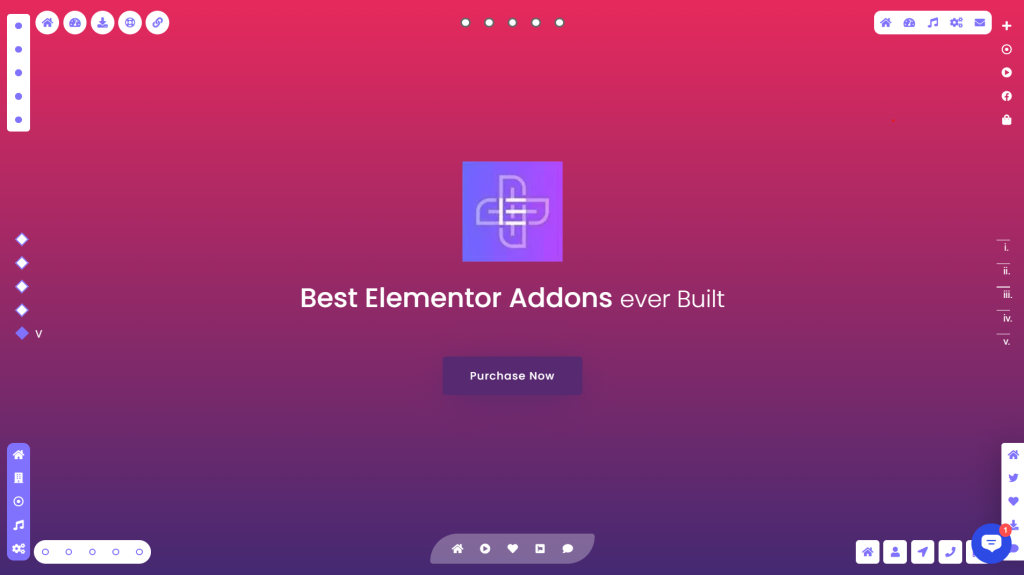
Here are some menu styles and alignment options you can explore with The Plus Addons for Elementor.
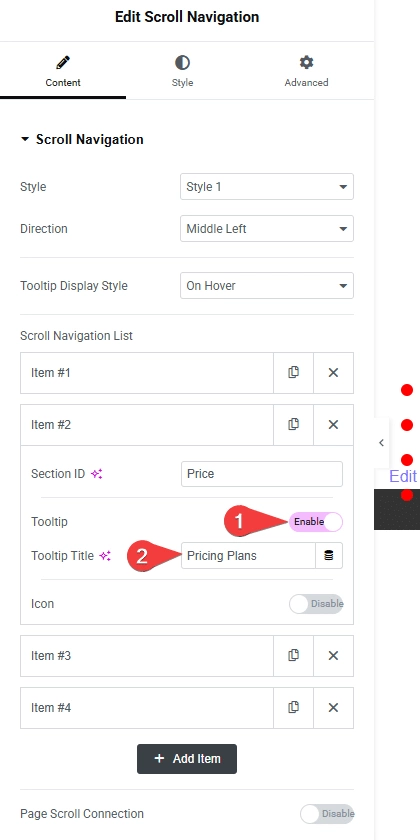
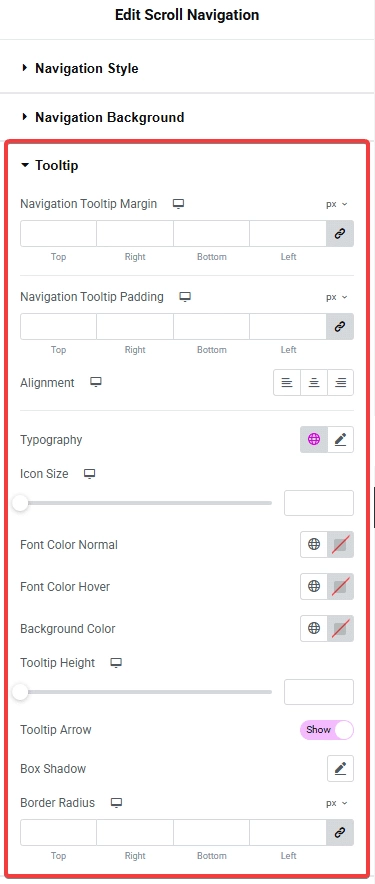
C. Add Tooltip Text
Tooltip text is a label that appears when you hover over or click an icon in the navigation menu.
You can choose to have the tooltip display continuously, only on hover, or when the user is viewing a specific section.
In the Style tab of the widget’s settings, you can adjust the tooltip’s margin and padding. You can also customize the typography and add a background to your tooltips.
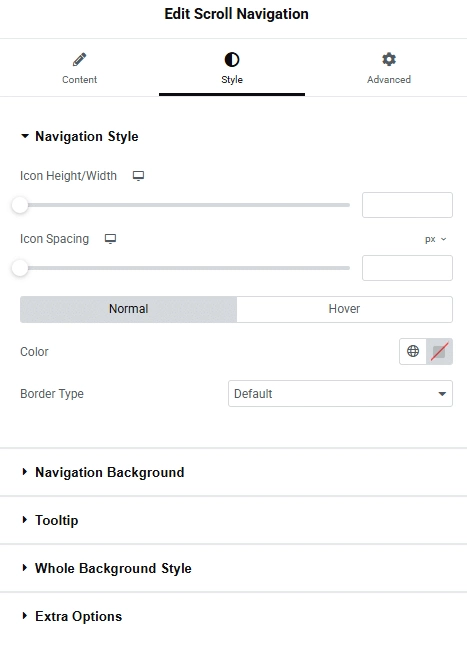
D. Add Icons
The Plus Addons let you add custom icons to each item in the scroll navigation menu.
Simply enable the Icon option, choose an icon library, and select the icon you want. You can also upload your own icons from your library.
You can also customize the icon’s color, size, and spacing in the Style tab of the Elementor settings.
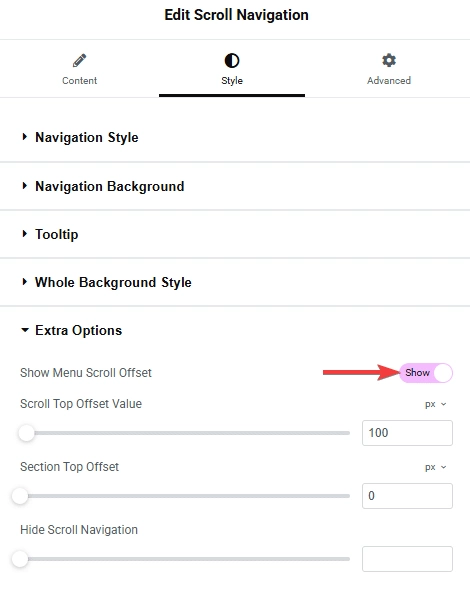
E. Menu Offset
The offset setting is another way to customize your one-page menu. When enabled in the Style tab, the menu remains hidden initially.
The menu will only appear once the user begins scrolling.
Step 7. Make Your Site Live
After fine-tuning your design and navigation menu, preview your page to check how it looks and works.
When you are satisfied, click Publish to launch your single page website with one page navigation.
Wrapping Up
A one-page site works best with smooth navigation that helps visitors easily find what they want. You can use menu links to jump between sections like products, campaigns, or landing pages.
When setting this up, think about how your audience uses your site. Consider their habits, devices, and what content they expect.
For $39 per year, you get access to 120+ Elementor widgets, including navigation menus, pop-ups, and dark mode options to enhance your site’s appearance and functionality.
Use these tools to create a clean, user-friendly experience tailored to your visitors’ needs.
FAQs about One Page Navigation
What does single page navigation mean?
Single page navigation lets you move through different parts of a website all on one page. Instead of loading new pages with new URLs, the site content is stacked in one long page you scroll or click through. This keeps everything in one place.
How does a one page navigation menu work?
A one page navigation menu has buttons or links that jump to specific sections on the same page. When you click a menu item, it scrolls down or up to that part. It also highlights the section you’re looking at, so you know where you are.
Why should you use one page navigation?
Using one page navigation has some clear benefits:
It puts all your content on a single page, so visitors don’t have to click around a lot.
It can make your site load faster because the browser makes fewer requests to the server.
Navigation is simpler, helping users find info quicker.
How can you add smooth scrolling for one page sites?
You can add smooth scrolling effects with tools like The Plus Addons for Elementor. This tool offers a drag-and-drop widget that lets you control how scrolling looks and feels. Adjust settings like the speed, smoothness, and animation timing to match your design needs.