Creating a website used to require a lot of coding skills, making it hard for many people to get started. Now, tools like Elementor make building WordPress sites simpler and more accessible, no matter your experience level.
With Elementor, you can easily design different types of pages, from blogs to online stores, without needing technical knowledge. It helps you build attractive, responsive websites using an intuitive interface and useful features.
In this guide on how to use Elementor in WordPress, we’ll walk you through the basics to help you get started. By the end, you’ll be ready to create stunning websites that stand out and connect with your audience.
Key Takeaways
- Elementor makes website design accessible without coding knowledge.
- It offers tools for creating professional and responsive layouts.
- Users can enhance their sites with advanced features and easy customization.
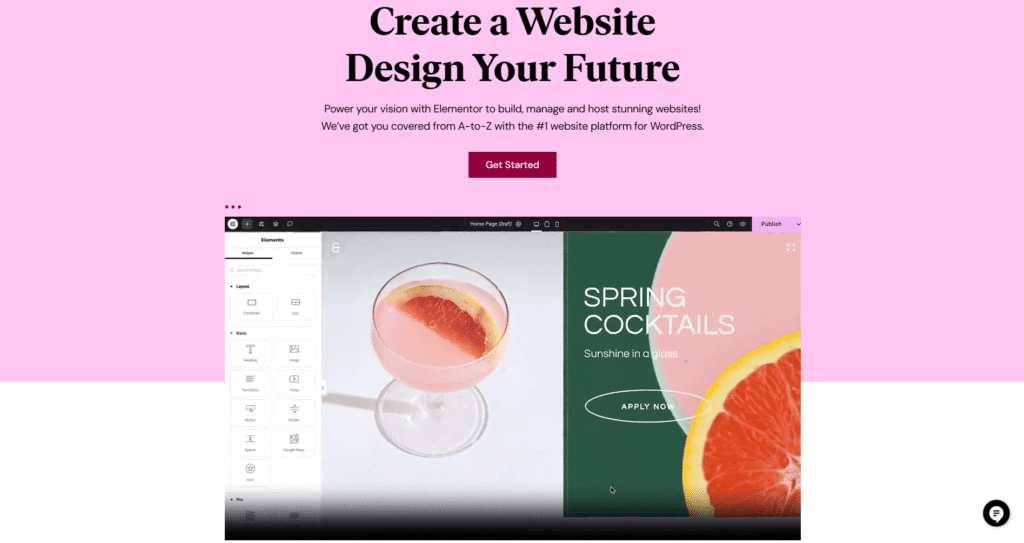
What is Elementor?
Elementor is a tool you can add to your WordPress website to help you design pages with ease. It gives you more flexibility than the basic WordPress editor. With Elementor, you can build your site visually, seeing exactly what it will look like as you work.
You use a drag-and-drop system, which means you click on the parts you want, like text boxes, images, or sliders, and move them where you want on the page. This way, you control how each part fits together.
You do not need to write any complicated code to create a professional and responsive website. Every part of your site’s look and layout can be changed to suit your needs.
What Are the Advantages of Building Your Site With Elementor?
Using Elementor brings a lot of helpful features you might want to know about:
- No Coding Needed: You can design web pages without knowing programming. Just dragging and dropping elements makes it easier for beginners and faster for experts.
- Instant Preview: You see your changes happen right away. This helps you adjust your design without switching back and forth between edit and preview screens.
- Templates to Start From: Elementor offers ready templates you can use right away. These can save you time and give you ideas for your design.
- Works on All Devices: You can make sure your site looks good on desktops, tablets, and phones by adjusting styles for each device.
- Lots of Widgets: You get many building blocks to add features like buttons, images, and sliders. These widgets give you many options for your site.
- Extra Features from Addons: There are other tools you can add to Elementor called addons. They bring new features and widgets that can make your site more interactive and advanced.
Elementor Page Builder: Pros and Cons for WordPress Users
Before you decide to use Elementor, consider some of the good points and the challenges it might bring.
Pros :
- Simple to Use: The drag-and-drop tool makes it easy for you to create good-looking pages, even if you have never coded before.
- Real-Time Changes: You don’t have to guess how your site will look because changes appear instantly on your screen.
- Control for All Screens: You can easily adjust your design to look great on phones, tablets, and desktops.
Many Widgets and Templates: It gives you many options to build your pages quickly with different components and designs.
Cons :
- Advanced Features Take Time: Some of Elementor’s more powerful tools can be tricky to learn, especially if you want to use coding or complex design techniques.
- Possible Conflicts With Other Plugins: Since it’s a plugin itself, sometimes Elementor might not work well with other tools you use on your site.
Free Version Limits: The free version is useful, but to get the best features and more control, you will have to buy the Pro version.
How to Use Elementor in WordPress
Now that you understand what Elementor is, let’s move on to how you can use it.
Follow this step-by-step guide to start your Elementor journey and build beautiful web pages with ease.
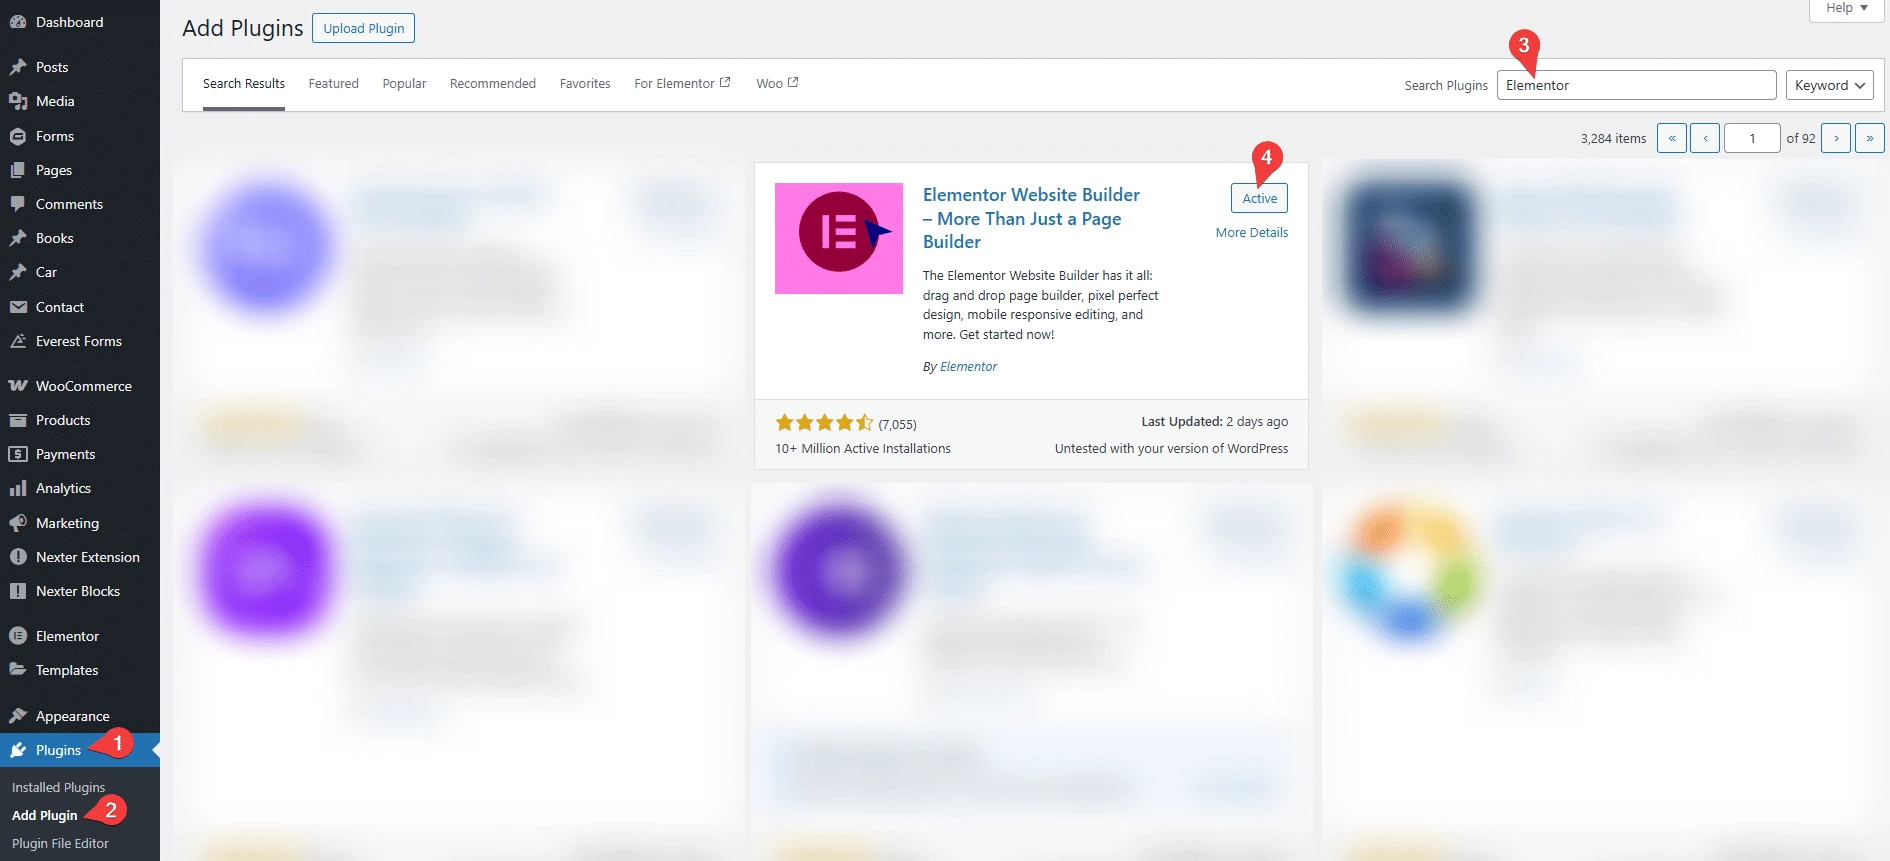
1. How to Add Elementor to Your WordPress Site
- First, sign in to your WordPress dashboard.
- Find the Plugins section in the menu on the left, then click Add Plugin. Use the search bar to look for Elementor.
- Next, click the Install Now button next to Elementor Website Builder. After installation, press Activate to enable Elementor on your website. Once active, you can start creating and editing your pages with Elementor’s easy-to-use interface.
2. How to Navigate and Use Elementor Features
Elementor comes with many tools to build your website. Here’s how to use the main parts:
A. Templates, Sections, and Blocks
Templates, sections, and blocks are three core elements in Elementor that simplify the website design process.
Let’s take a closer look at how to use these features to create a fully customizable website layout.
- Templates
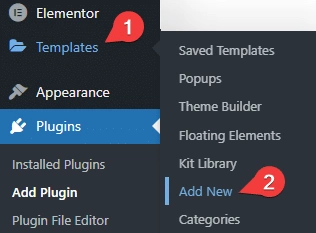
Templates are ready-made page layouts you can insert into your site. To add one, go to Templates in WordPress, click Add New, and browse through the Template Library.
Explore different categories to find the perfect template. Simply hover over a template to Preview it, then click Insert to add it to your page.
After inserting the template, you can click on any element to edit and customize it to fit your needs.
- Sections
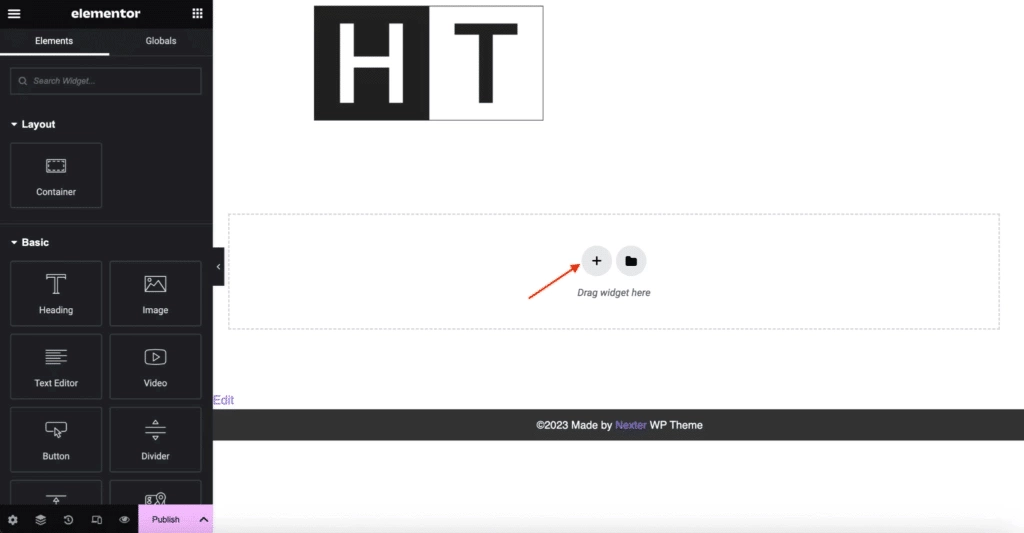
- Sections help organize your page content. Click the + icon in the Elementor editor to add one, then pick how many columns you want.
- You can Add New Columns or change the size of existing ones.
- When a section is selected, use the left panel to style it. You can adjust the background, padding, margin, and other design settings.
- Blocks
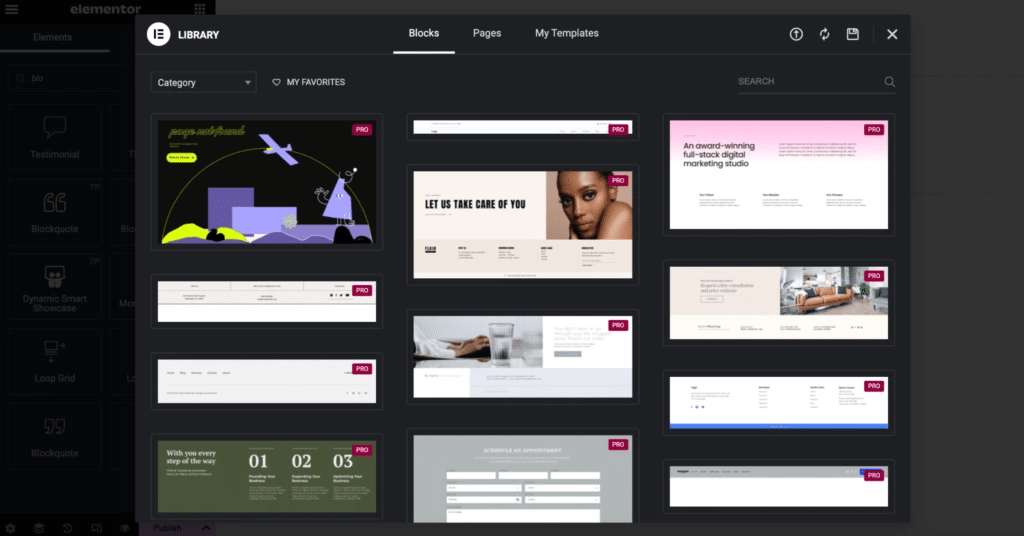
- Blocks are smaller pre-designed pieces, like call-to-action boxes or testimonials. Click the folder icon in Elementor, select the Blocks tab. Here, you can explore various block types such as Call to Action, Testimonials, and more.
- To add a premade block to your page, simply click Insert.
- After inserting a block, you can customize each element individually. Adjust the text, colors, images, and more to align with your overall design.
B. Widgets
Widgets are the core building blocks in Elementor, letting you add both content and design elements to your pages. These include everything from simple text and images to advanced features like sliders, testimonials, and social media icons.
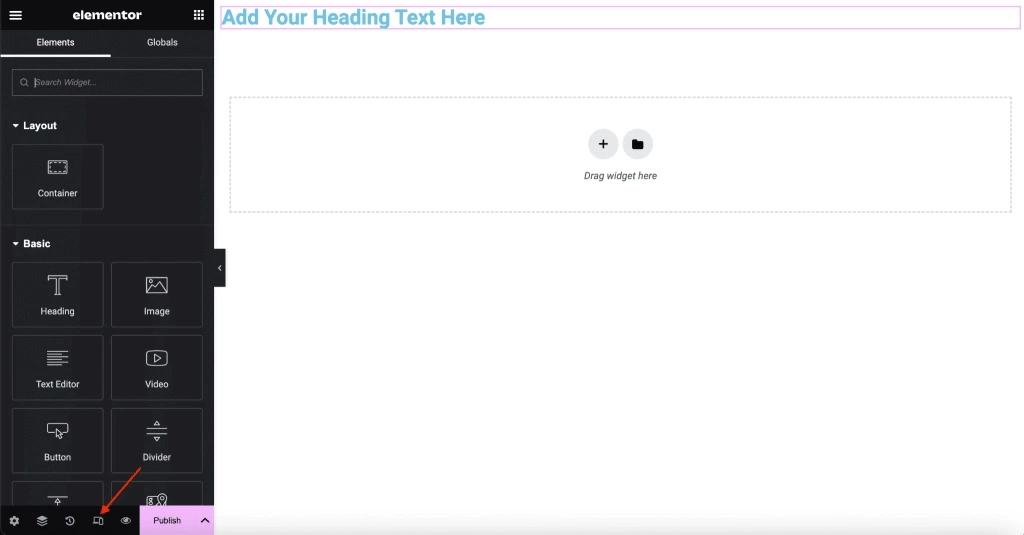
To add a widget, just drag it from the Elementor panel and drop it onto your page. Then, customize its look, layout, and content to suit your needs.

C. Theme Customization
Elementor lets you customize not only your page content but also key parts of your WordPress theme.
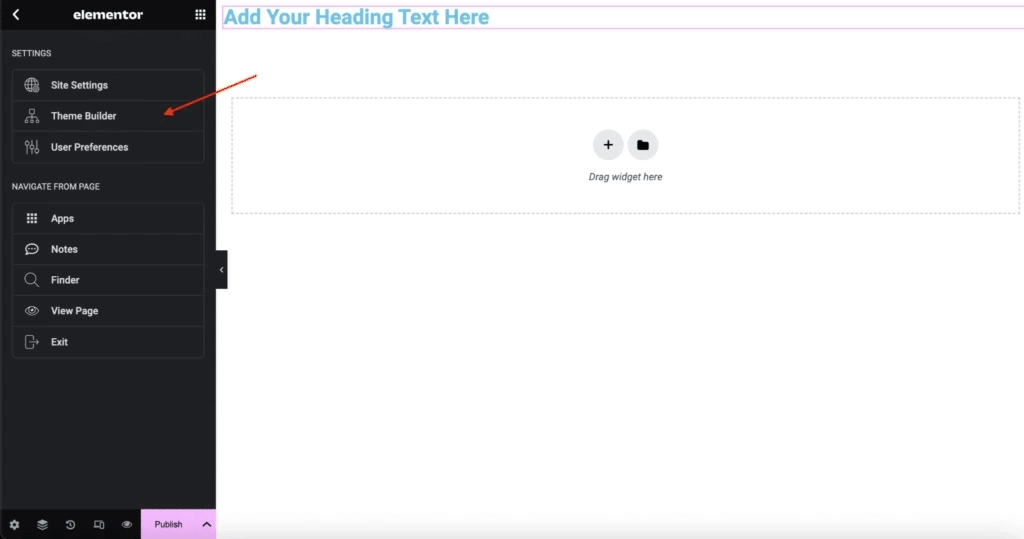
To access the Theme Builder, click the hamburger menu in the top-left corner of the Elementor panel and select Theme Builder.
D. Responsive Design Settings
Elementor makes it easy to ensure your website looks great on all devices.
You can switch between desktop, tablet, and mobile views using the icons at the bottom of the Elementor panel.
For each view, you can customize element sizes, spacing, and alignment to achieve the best display on every screen.
E. Global Design Settings
In addition to editing individual widgets, Elementor also lets you adjust settings for your entire website. These global settings help you maintain a consistent design across all pages.
To access them, click the hamburger menu in the top-left corner of the Elementor editor and choose ‘Site Settings’.
Here, you can define global styles for fonts, colors, and other design elements.

These settings apply across all pages and posts on your site, helping you maintain a consistent design while also saving time.
3. How to Work with Elementor’s Free Version
Elementor’s free page builder is a powerful and flexible tool that changes the way you create websites.
Let’s go through the steps to start using it:
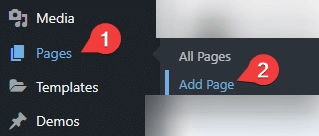
Step 1: In your WordPress dashboard, navigate to Pages and click Add Page. Give your page a name to begin.
On your newly created page, you’ll see an Edit with Elementor button. Click it to launch the Elementor Page Builder.
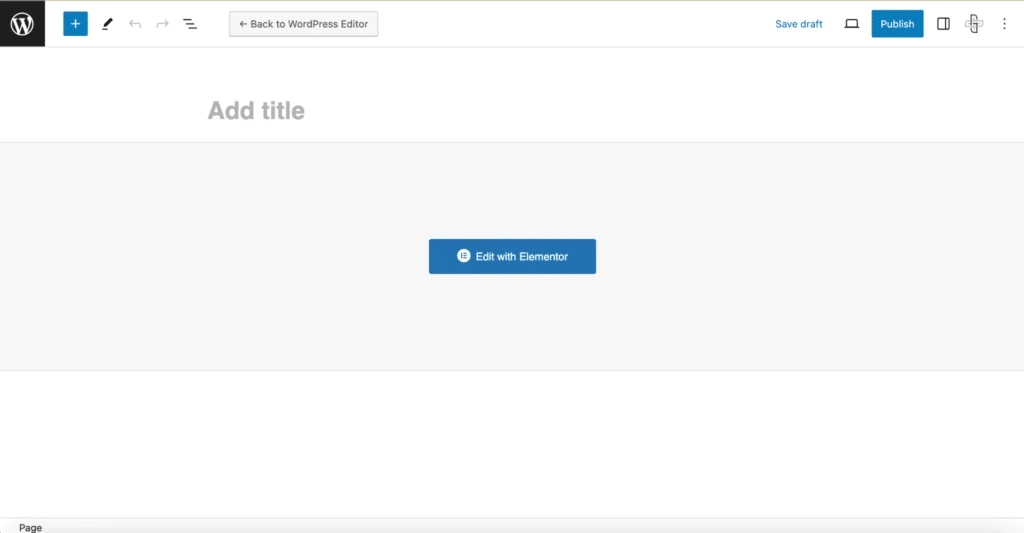
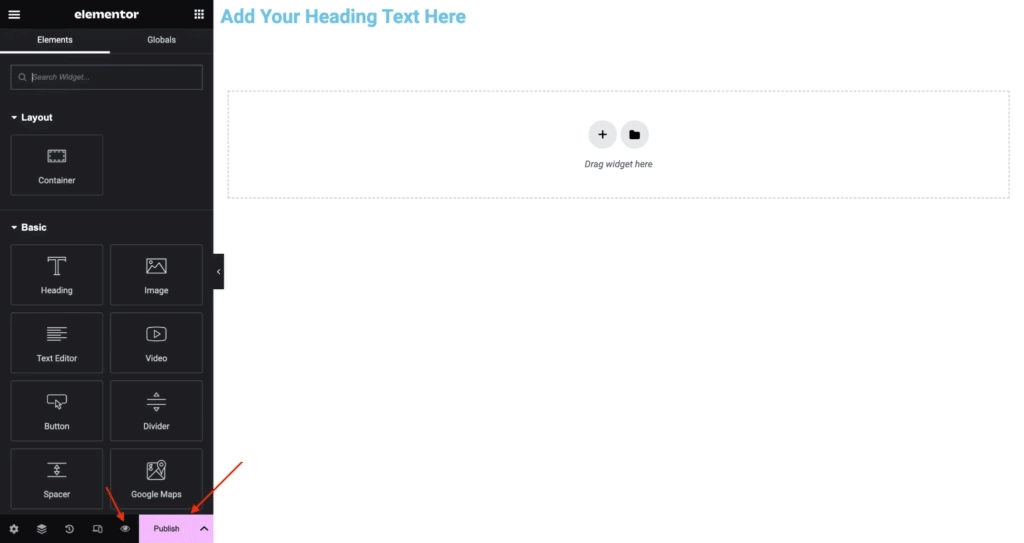
You’ll notice two main sections: the canvas, where you design your page, and the Elementor panel, which contains various widgets and customization options.
Step 2: Click the ‘+’ button to add a new section and choose the column layout you want.
Then, drag widgets from the Elementor panel into the section.
Widgets include elements such as text, images, buttons, and more.
Step 3: Every widget and section comes with its own customizable settings.
You can adjust font sizes, change colors, upload images, and more.
Try experimenting with these options to see how they affect your page design in real time.
Step 4: Click the Preview button (eye icon) to see how your page will look live.
Use the Responsive Mode feature to check and adjust the design for desktop, tablet, and mobile devices.
Step 5: When you’re happy with your design, click Publish to make your page live. If you’re not ready to go live yet, click Save Draft to keep your changes and continue later.
4. Using the Theme Builder in Elementor: A Step-by-Step Guide
The Elementor Theme Builder is a user-friendly tool that allows you to customize the overall layout and design of your website.
With it, you can design key areas like headers, footers, and other essential sections to ensure a consistent look throughout your site.
Let’s explore how you can use this powerful feature.
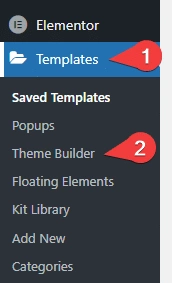
Step 1: In your WordPress dashboard, go to Templates and click on Theme Builder.
This will open a central hub where you can manage and customize all the key parts of your website’s theme, such as the header, footer, single post, and more.
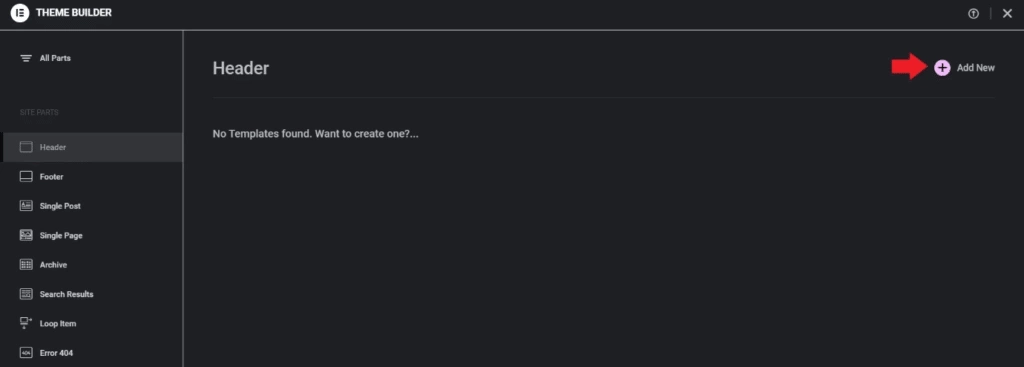
Step 2: In the Theme Builder interface, you’ll see sections for Header, Footer, Single Post, and more.
Take a moment to explore these areas to understand where each template applies to your website.
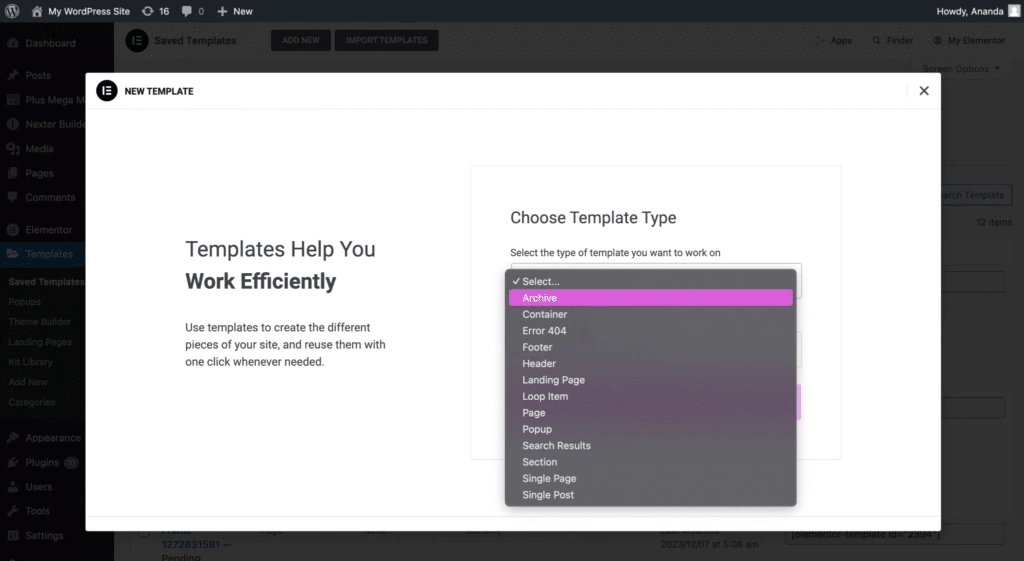
Step 3: To begin designing, select the type of theme part you want to create (e.g., Header), then click Add New.
You can either build it from scratch or choose from a variety of pre-designed templates to get started quickly.
Step 4: Whether you use a template or start from scratch, you’ll be taken to the Elementor editor.
Here, you can drag and drop widgets and customize them to match your site’s design style.
For Example, when designing a header, you might include your site’s logo, a navigation menu, and social media icons to create a visually appealing and functional layout.
Step 5: After finalizing your design, set the display conditions to specify where this theme part will appear on your site.
Setting these conditions ensures your design is applied consistently across the desired pages or sections.
Step 6: Preview your theme to see how it looks on your site. When you’re satisfied, click Publish to apply and finalize your design.
5. How to Use Elementor’s Advanced Features
Elementor’s advanced features take your web design to the next level by providing powerful tools for in-depth customization and creative freedom.
With these features, you can add advanced styling, animations, and complex functionalities to enhance your WordPress site.
Let’s dive into how you can use these advanced capabilities to create stunning and dynamic websites.
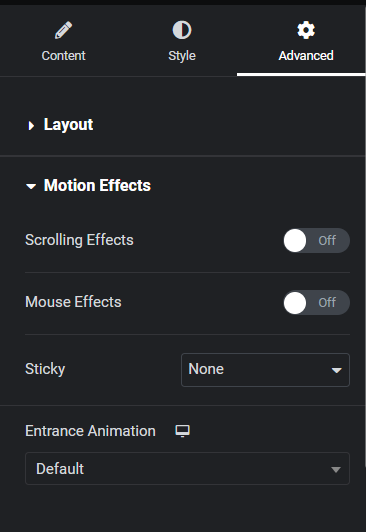
A. Motion Effects
In the Elementor editor’s left-side settings panel, go to the Advanced tab. There, you’ll find the Motion Effects option, which lets you add scrolling animations and effects to widgets and sections.
You can also make elements sticky, this is especially useful for headers or menus that stay fixed at the top or bottom of the page as users scroll.
B. Transform Widgets
You can apply transformations to widgets to change their appearance when users hover over them with the mouse.
This feature is also found under the Advanced tab in the left panel. Simply choose the transformation options you want for both the widget’s normal and hover states.
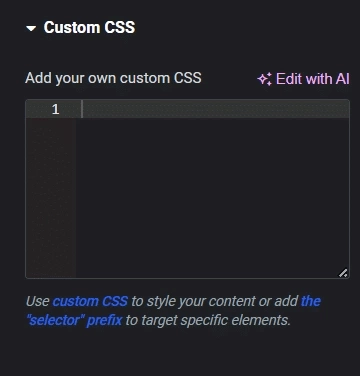
C. Custom CSS
For greater design control, Elementor lets you add custom CSS directly to individual elements.
This is perfect when you want to apply specific styles that aren’t available through the standard settings.
You can find the Custom CSS option under the Advanced tab in the left panel.
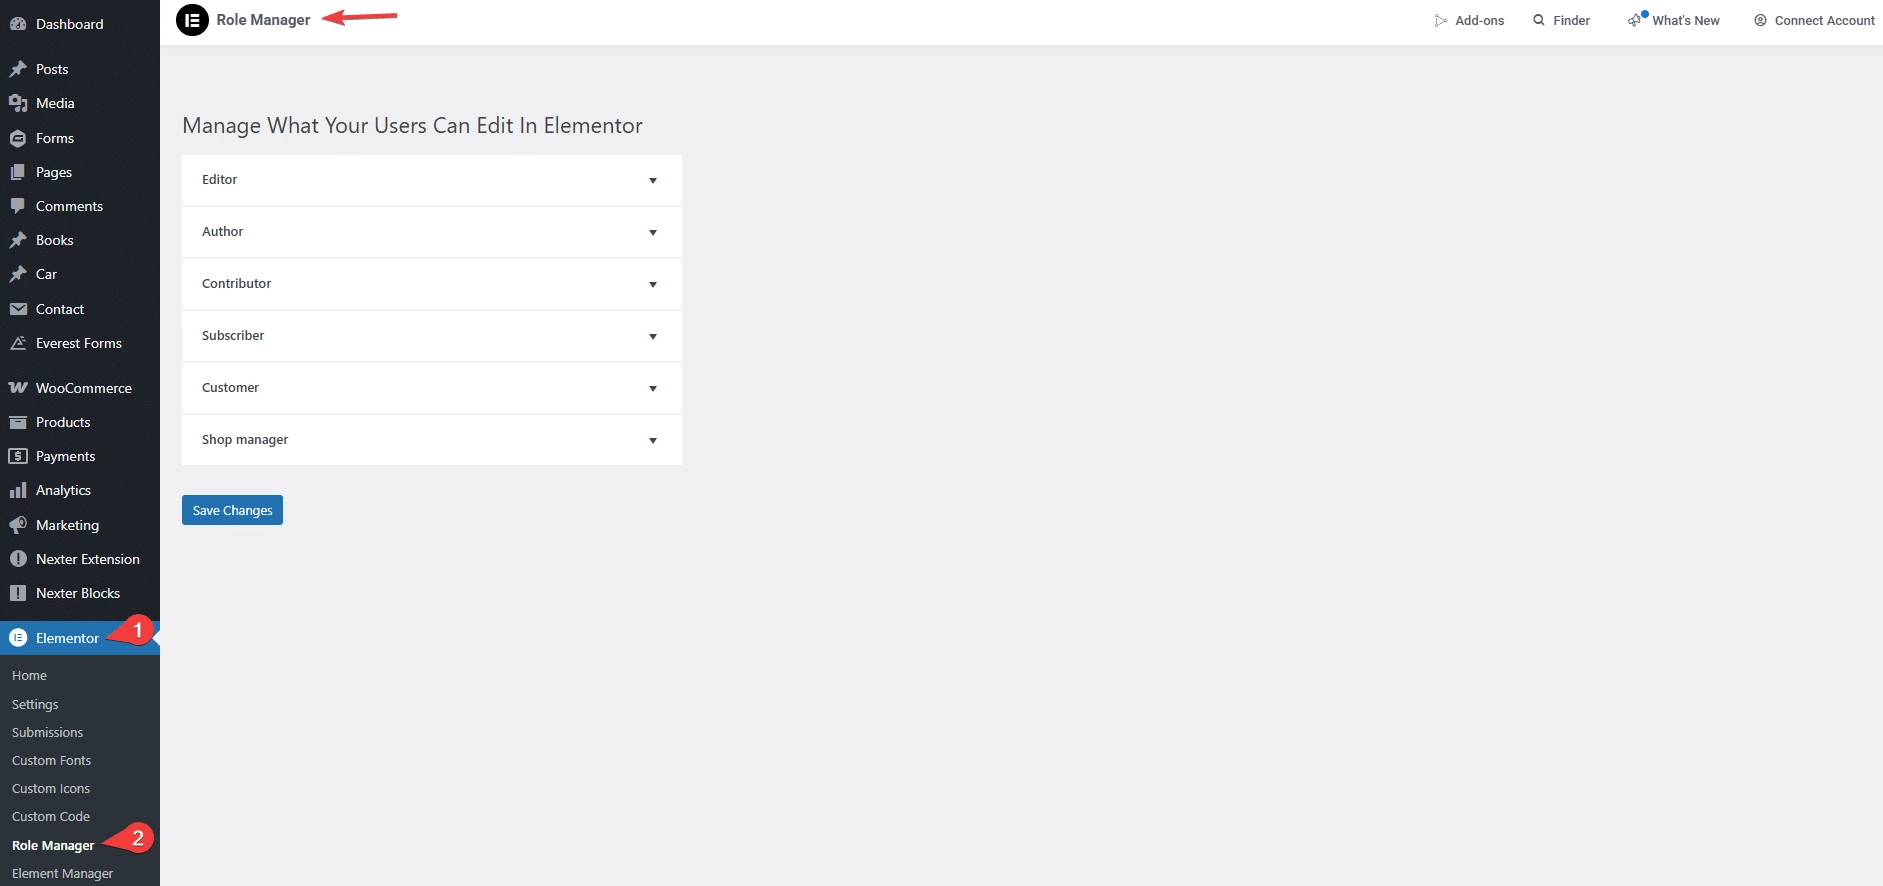
D. Role Manager
When working with a team, the Role Manager is an essential tool. It allows you to control who can edit your site and what parts of Elementor they have access to, helping maintain design and content consistency.
You can find the Role Manager under the Elementor tab in the WordPress side menu.
Many of these advanced options may require Elementor Pro.
6. Key Differences Between Elementor Free and Pro
Elementor comes in two versions — Free and Pro — each designed to meet different web design needs and skill levels.
Knowing the key differences between Elementor Free and Elementor Pro will help you choose the version that best fits your website goals.
Elementor Free
This version is a great starting point for beginners or anyone wanting to build simple yet attractive websites. It offers:
- A user-friendly drag-and-drop editor.
- Access to a variety of widgets and templates for quick website design.
- Responsive design features to ensure your site looks great on all devices.
While Elementor Free is packed with useful features for a free plugin, it does have limitations, especially when it comes to advanced design tools and marketing integrations.
Elementor Pro
Elementor Pro builds on the free version by offering advanced features designed for professional web designers and businesses.
It includes:
- Advanced widgets such as forms, sliders, and WooCommerce elements.
- A powerful Theme Builder that lets you design complete themes, including headers, footers, and archive pages.
- A Popup Builder to create interactive popups for lead generation, announcements, or promotions.
- A larger library of templates and blocks, giving you more design flexibility.
- Support for dynamic content and custom field integration, essential for complex, professional websites.
- Role Manager, which is especially helpful for teams, allows you to control who can access and edit various design elements.
You can unlock Elementor Pro features by upgrading to one of Elementor’s premium plans. The pricing options are:
- Essential Plan – $59 per year
- Advanced Plan – $99 per year
- Expert Plan – $199 per year
Each plan offers different levels of access and support to suit your needs.
Elementor Free vs. Elementor Pro
| Feature | Elementor Free | Elementor Pro |
| Widgets | Basic widgets available | Over 50 advanced widgets |
| Templates | Limited access to templates | Access to over 300 templates |
| Theme Builder | Not available | Full theme-building capability |
| WooCommerce Builder | Basic WooCommerce support | Advanced WooCommerce features |
| Popup Builder | Not included | Integrated popup builder |
Reasons to Choose Elementor for Your WordPress Site
Choosing Elementor as your WordPress page builder offers clear advantages over many other plugins. Its powerful features and user-friendly design make it a favorite among everyone, from beginners to experienced web developers.
One of Elementor’s biggest strengths is its intuitive drag-and-drop interface, which allows you to design and edit pages visually—no coding required. This makes the design process faster, easier, and more accessible.
Beyond basic customization, Elementor offers advanced control over every design element. You can fine-tune everything—from text alignment and spacing to animations and motion effects—giving you complete creative freedom.
Another key benefit is its focus on responsive design. Elementor equips you with tools to ensure your website looks great and functions smoothly across all screen sizes. This not only improves user experience but also contributes to better SEO performance.
In short, Elementor empowers you to build professional, responsive, and fully customized websites without the complexity.
Bonus Point: How to Enhance Your Elementor Experience
Elementor’s versatile and user-friendly interface unlocks a wide range of possibilities for designing websites in WordPress.
A major advantage of Elementor is its seamless integration with various add-ons, which further enhance its functionality and provide even greater creative flexibility.
Among these third-party integrations, The Plus Addons for Elementor stands out as a powerful tool, offering a rich collection of additional features to enhance the Elementor page builder.
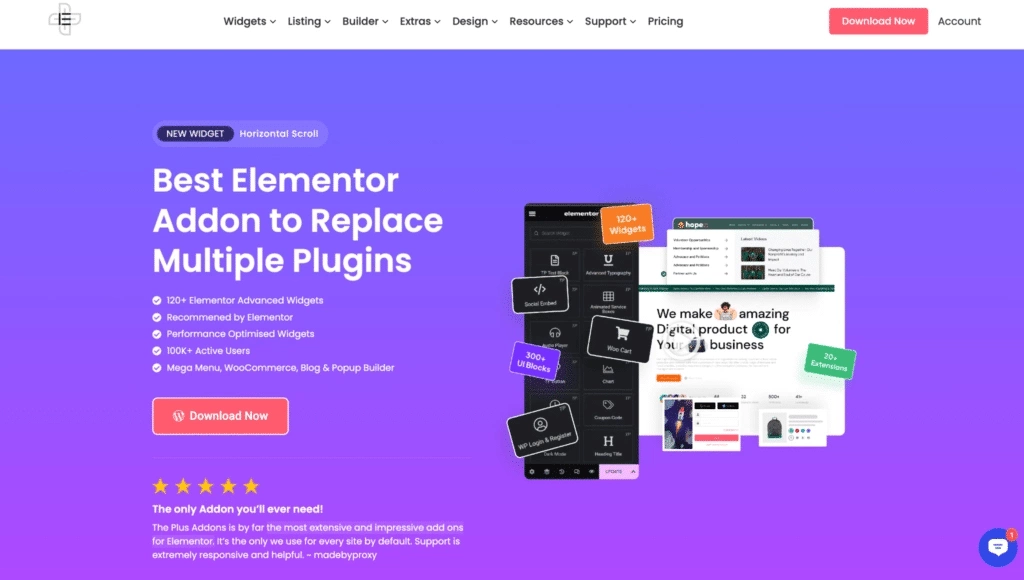
1. Extensive Widget Library
The Plus Addons for Elementor offers over 120 unique widgets, significantly expanding the variety of content and design elements you can add to your pages.
You can showcase your content in attractive layouts like grids and carousels, ideal for portfolios, blog posts, and more.
Additionally, advanced styling options give you precise control over margins, padding, borders, backgrounds, and other design details, allowing for highly customized looks.
Explore the full list of 120+ widgets and extensions here, and start building your dream website—no coding required!
2. E-Commerce Enhancements
Use The Plus Addons for Elementor to enhance your online store with specialized widgets that improve the presentation and functionality of your products.
You can also take advantage of elements like call-to-action (CTA) widgets and form builders that help attract visitors and drive more conversions and sales.
3. Advanced Design Features
Bring your website to life with animations and interactive elements that create a compelling visual narrative and enhance storytelling.
These features are regularly updated to ensure you stay ahead of the latest web design trends.
4. Active Support
The Plus Addons for Elementor offers responsive and efficient support, ensuring a smooth user experience. With a dedicated team providing timely assistance and regular updates, users can easily overcome any challenges.
Additionally, there is extensive support documentation available to guide you through every step of your web design journey.
This dependable support system is invaluable for troubleshooting and maximizing the full potential of the addon’s wide range of features.
Wrapping Up
Now that you know how to use Elementor, you can start building your WordPress site with confidence. The tool’s simple layout helps you create clean, professional pages quickly.
Elementor is easy to use and helps you create great-looking websites. You can make it even better by adding the right addons for more advanced features.
The Plus Addons for Elementor is a powerful option that adds over 120 widgets to your design toolkit. It unlocks new levels of creativity and functionality, enabling you to build complex, dynamic, and visually engaging websites with ease.
Tips for moving forward:
- Explore different widgets to see what fits your style.
- Use addons like The Plus Addons to unlock advanced design options.
- Keep your layout clear and easy to navigate for visitors.
By combining basic steps with useful extensions, your website will look great and work well without much hassle.
FAQs on How to Use Elementor in WordPress
What makes WordPress different from Elementor?
WordPress is a content management system (CMS) that helps you build and manage websites on your hosting server. Elementor, on the other hand, is a drag-and-drop page builder plugin for WordPress. You install it to design your site easily. Check out our WordPress vs. Elementor comparison for more details.
How do you use Elementor inside WordPress?
You install Elementor as a plugin in WordPress. After that, you can open a visual editor where you build and change page layouts. This tool adds more design options than WordPress gives on its own, making it easier to create custom web pages.
Is Elementor simple to learn and use?
Yes, Elementor is made to be easy, even if you don’t know how to code. You can move items around on the page with your mouse. You also see your changes right away, which helps you understand how your site will look as you work.
What are some good tips to follow when using Elementor with WordPress?
To create an effective website with Elementor, it’s important to keep your page designs simple for better readability and faster performance. Make sure that the images you use are optimized so they don’t slow down your site. Take advantage of Elementor’s responsive settings to ensure your website looks great and functions well on both phones and tablets. Additionally, regularly updating WordPress and Elementor is essential to keep your site secure and running smoothly.
Can you build mobile-friendly websites with Elementor?
Elementor lets you create designs that fit different screen sizes automatically. You can change settings to make parts of your page hidden or shown on phones or tablets. This lets your site look good no matter what device is used.
Are there plugins that improve Elementor’s features?
Yes, Plugins like The Plus Addons for Elementor can boost Elementor with powerful features and extra tools. It includes over 120 WordPress widgets, 300+ UI blocks, and 18+ ready-to-use templates. You can use and customize them just like any other Elementor widget.