How to Make an Elementor Sticky Header Stop at a Section or Footer
A sticky header is a good idea until it follows the visitor into the one place where it gets in the way. The usual suspects are a full-screen contact section, a pricing table with its own sticky column, a footer with a newsletter form, or a long landing page whose last block has its own call to action. In each case the header sits on top of content that needs the whole screen. Elementor’s own sticky setting has no answer for this, because it only knows two states: stuck, or not.
This guide shows how to make an Elementor sticky header stop at a defined point. It uses the Sticky Until feature in Sticky Header Effects Pro, the paid add-on to the free Sticky Header Effects for Elementor plugin, which has more than 300,000 active installs. Everything below comes from the add-on’s own settings and code, including one behavior that surprises people: when the boundary is reached, the header does not freeze in place. It fades out, and comes back when the visitor scrolls up.
Key Takeaways
- Sticky Until is a Pro feature. It lives inside the Sticky Header Effects panel on the Advanced tab of your header section or container.
- It needs the main Enable switch of the free plugin to be on first. The Sticky Until controls stay hidden until then.
- You choose the release point with a Boundary setting: End of Container, End of Page, Custom Element, or Scroll Distance in pixels.
- At the boundary the header fades out with pointer events switched off. It does not stay pinned at a fixed position, and it re-engages when the visitor scrolls back up.
- The Offset field moves the release point later with a positive number and earlier with a negative one.
- Test on tablet and phone, on the live page, with caching cleared.
Why a Sticky Header Needs an Exit
A header that is stuck to the top of the window always costs some of the screen. On a normal article page that cost is small and the benefit, a menu that is always within reach, is worth it. The balance changes on pages built from distinct blocks, where one block wants the full viewport.
Three situations come up again and again:
- A full-height section. A hero or a contact block that is designed to fill the screen loses its top edge to the header.
- A section with its own sticky element. A pricing table with a sticky plan switcher, or a sidebar with a sticky table of contents, competes with the header for the same strip of screen. Two sticky things at the top is rarely what you meant.
- A footer that carries the real call to action. When the last thing a visitor should see is a form or a button, a header floating above it adds nothing and can cover the first line of the form.
You can solve this with custom CSS and a few lines of JavaScript, and many people do. The cost is that you now own a script that has to survive theme updates, lazy-loaded images that change page height, and every responsive breakpoint. A setting in the editor is easier to hand over to the next person who edits the page.
What You Need Before You Start
- Elementor on your site. The plugin works on Elementor Free or Elementor Pro, and the header can be a section or a container.
- The free Sticky Header Effects for Elementor plugin, installed and active.
- The Sticky Header Effects Pro add-on, installed and active with a valid license. The free plugin must be present as well, because Pro adds its controls to the free panel.
- A header that already sticks. If you have not set that up yet, read the Elementor sticky header setup guide first.
If you use the Elementor Theme Builder, edit the header template itself, not a page that displays it. The settings belong to the header section, so they apply wherever that template is shown.
Step 1: Turn On the Sticky Header Effects Panel
Open the page or header template in Elementor and click the section or container that wraps your header. Go to the Advanced tab and find the panel named Sticky Header Effects. Switch on the Enable control at the top. This is the control that makes the header sticky, and the Pro settings depend on it. If you open the panel and cannot find Sticky Until, this switch is the first thing to check.
Set the Scroll Distance as you normally would for this header. That value controls when the sticky behavior begins. Sticky Until controls when it ends, and the two work as a pair: a start point and an end point.
Step 2: Switch On Sticky Until
Further down the same panel you will see a switch labeled Sticky Until. Turn it on. A Boundary dropdown appears, along with an Offset field. A short note under the controls explains the behavior in plain words: the sticky header fades out when the boundary is reached, and scrolling back up past the boundary brings it back.
Step 3: Pick the Boundary
The Boundary dropdown is the decision that matters most. Each choice answers a different question, so it helps to start from what you are trying to protect.
End of Container
This releases the header when the parent section or container that wraps it ends. It is the right pick when your header sits inside a larger wrapper and you want the sticky behavior to last only as long as that wrapper does. Be careful here: many Theme Builder headers are the only thing inside their own wrapper, which means the container ends almost immediately. If the header releases far too early, this is the likely reason, and a different boundary will serve you better.
End of Page
This releases the header at the end of the page. It is meant for cases where the header should stay for the whole read and leave only at the final edge. Preview it on your own page, since the exact release moment depends on your layout.
Custom Element
This is the most precise option and the one most people end up using. You type a CSS selector into the Element Selector field, such as #footer or .contact-section. The header releases when the top of that element reaches the top of the viewport. To get a selector, give the target section a CSS ID in Elementor (Advanced tab, CSS ID field) and use it with a hash in front, or give it a CSS class and use it with a dot.
A few habits make this option reliable:
- Use an ID that is unique on the page. If two elements share a selector, make sure the first match is the one you mean.
- Type the selector exactly, including the leading
#or.. A missing symbol means nothing matches and nothing is released. - Avoid selectors that depend on theme markup that may change. An ID you set yourself in Elementor is more stable than a class generated by a theme.
Scroll Distance
This releases the header once the visitor has scrolled a set number of pixels from the top of the page. It is a blunt tool, but it is predictable and needs no selector. It suits short landing pages whose layout does not change much. It is less suited to pages with lazy-loaded images, since the height of the content above the target can change after load. The slider is responsive, so you can set a different distance for tablet and mobile.
Step 4: Fine-Tune With the Offset
The Offset field is measured in pixels and accepts negative numbers. A positive value pushes the release point later. A negative value pulls it earlier. In practice you will use it for one reason: the header has height, and the release is measured against the top edge of the target.
Imagine a header that is 90 pixels tall and a contact section that starts at the viewport top at the moment of release. For a brief stretch the header would cover the top of that section. A negative offset around the header height releases the header just before it can collide with the section, so the visitor never sees the overlap. Start with a value close to the header height, preview, and adjust in small steps.
What the Header Does at the Boundary
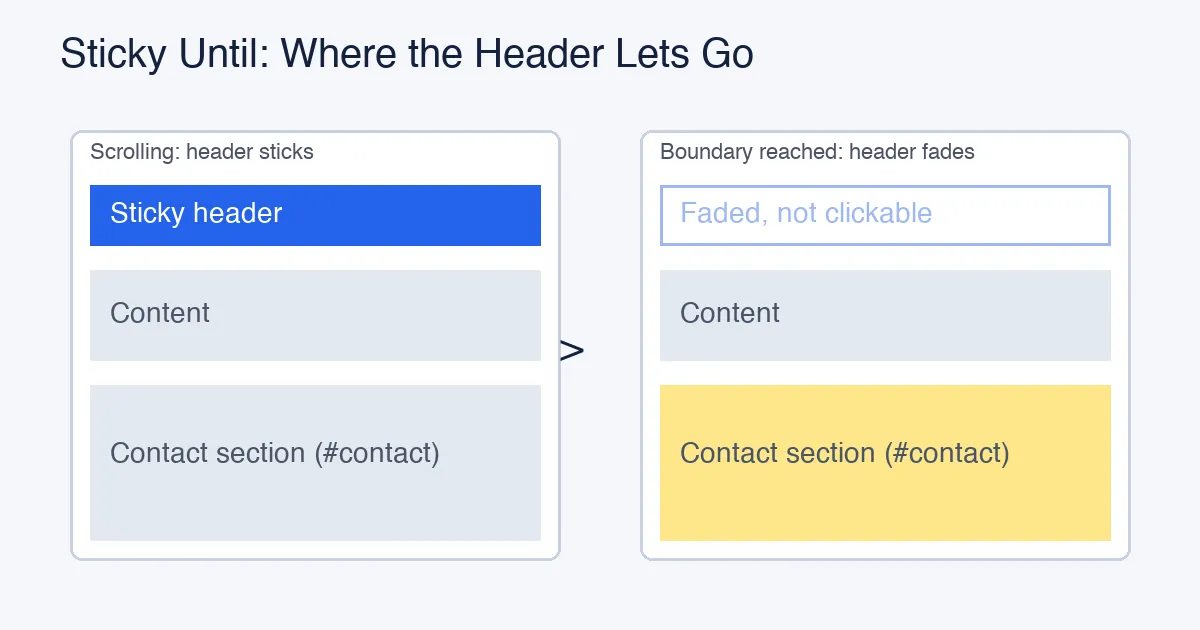
This is the part to understand before you promise a client anything. Sticky Until does not park the header at a fixed spot on the page. When the boundary is reached, the header fades to fully transparent and stops responding to clicks. When the visitor scrolls back up past the boundary, the sticky behavior takes over again as normal.
The reason is stated in the add-on’s own notes: freezing the header at one coordinate would fight the free plugin’s per-scroll positioning and cause visible jitter, so the first version uses a hide-on-release model. For most layouts this is also what you want, since a header that gets out of the way is exactly the goal. But if your design needs the header to stay visible but unstuck, sitting at the bottom of its container like a normal block, this feature is not that. Plan around it by choosing a boundary far enough down that fading out feels natural.
Because the released header has pointer events switched off, nothing invisible blocks clicks on the content beneath it. That matters for forms and buttons placed right where the header used to be.
Common Setups That Work Well
A Landing Page With a Final Call to Action
Give the final section a CSS ID such as final-cta, set the Boundary to Custom Element, and enter #final-cta. Add a negative offset close to the header height. The header stays with the visitor through the page and gets out of the way as the call to action arrives.
A Page With a Sticky Sidebar or Table of Contents
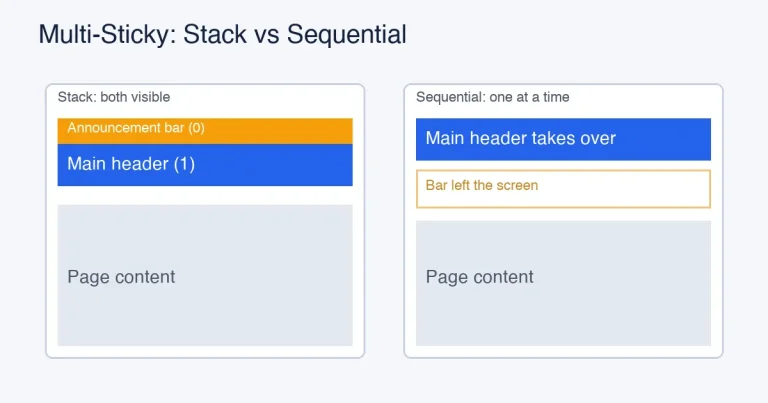
Give the section that holds the sticky sidebar an ID and release the header there. Two sticky elements no longer fight for the same strip of the screen. If you actually want both visible at once, for example a thin announcement bar above a main menu, that is a different feature. See how to stack an announcement bar and a sticky header.
A Short Page Where Only the Hero Needs the Header
Use Scroll Distance. Set it to roughly the height of the hero. The header is sticky while the visitor is in the hero and releases after it. You can combine this with a transparent header so the header blends into the hero and the release feels like a continuation of the design.
Combining Sticky Until With Other Header Effects
Sticky Until sits in the same panel as the other effects, and the combinations behave sensibly. A header that has shrunk on scroll (see how to shrink a header on scroll) will fade out at the boundary in its shrunk state, then return in that state when the visitor scrolls back. A header that changes background color on scroll keeps that color until release.
One pairing to treat with care is Hide Header on Scroll Down. Both effects make the header disappear, but for different reasons, so using both can make it hard to tell which one is acting when you test. Turn one off, confirm the other works, then turn both on and test again.
If you want different headers on different pages entirely, rather than one header that releases, Display Conditions in the Pro add-on is the better tool. It lets you include or exclude the sticky behavior by page, post type, taxonomy term, user role, or a fragment of the URL.
Testing Checklist
- Open the live page in a private window, not the Elementor editor. The editor does not run the frontend scripts for this feature.
- Scroll slowly through the target area and watch for the exact moment of release.
- Scroll back up past the boundary and confirm the header returns.
- Resize to tablet and phone widths and repeat. If you used Scroll Distance, check the responsive values.
- Clear page cache, any optimization plugin cache, and the CDN cache before judging the result. A stale cached page shows old settings.
- Reload with images still loading, on a slow connection if you can. Late-loading images change page height and can shift a pixel-based release.
Troubleshooting
The Sticky Until Switch Is Missing
Check that the Enable switch in the Sticky Header Effects panel is on, that the Pro add-on is active alongside the free plugin, and that the license is valid. The Sticky Until controls only appear when Enable is on.
The Header Never Releases
With Custom Element, the selector probably matches nothing. Check for a missing hash or dot, and confirm the ID is set on the target section in Elementor. With Scroll Distance, the number may be larger than the page is tall.
The Header Releases Too Early
If you chose End of Container, the wrapper may be short. Switch to Custom Element or Scroll Distance. If the release is only slightly early, add a small positive offset.
The Header Overlaps the Section Just Before It Disappears
Apply a negative offset roughly equal to the header height so that it fades out before it reaches the content.
It Behaves Differently on Mobile
Use the responsive slider for Scroll Distance, and test the actual target position on a small screen. Section heights usually differ there, so a boundary that fits desktop can be wrong on a phone. If the whole header is acting strangely on mobile, our guide to the sticky header on mobile covers what changes.
Frequently Asked Questions
Is Sticky Until Free or Pro?
It is part of Sticky Header Effects Pro. The free plugin provides the panel and the Enable switch it depends on.
Does the Header Stay Visible After It Is Released?
No. In the current version the header fades out when the boundary is reached and becomes unclickable. It returns when the visitor scrolls back up past the boundary.
Can I Release the Header at the Footer?
Yes. Give the footer or the section above it a CSS ID, choose Custom Element as the Boundary, and enter the selector. Use a negative offset to release a little before the footer reaches the top.
Does It Work on Elementor Containers and Sections?
Yes. The controls are registered for both sections and containers.
Can I Use a CSS Class Instead of an ID?
Yes. Any valid CSS selector works in the Element Selector field, for example .contact-section. An ID is usually safer because it is unique.
Will It Slow Down My Pages?
The scripts and styles for this feature load only on pages where a header has Sticky Until switched on, so pages that do not use it carry no extra files from it.
Can I Set Different Release Points for Desktop and Mobile?
Yes for the Scroll Distance boundary, because that slider is responsive. For Custom Element the target is the same on every device, so check that the element exists and sits where you expect on small screens.
Suggested Reading
- Elementor Sticky Header: The Complete Setup Guide
- Announcement Bar and Sticky Header Together in Elementor
- Header Scroll Distance: Controlling Exactly When Sticky Kicks In
- Elementor Sticky Header vs Fixed vs Static
- How to Hide the Header on Scroll Down in Elementor
- Fixing Sticky Header Effects That Cancel Each Other Out
Want the sticky header without the code?
Sticky Header Effects for Elementor drops in as a widget. Free plugin, no account needed.