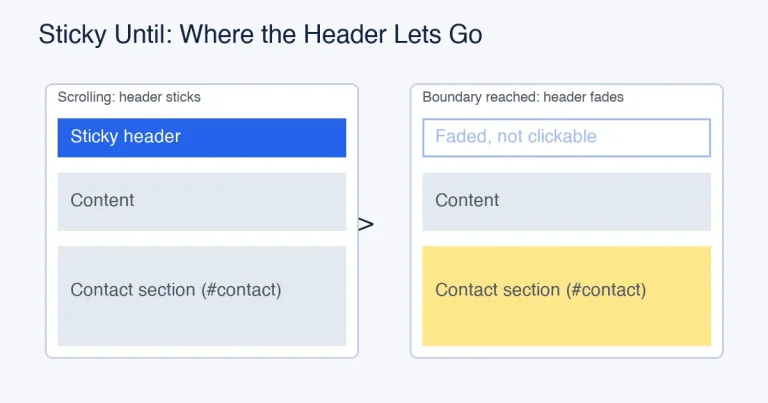
Elementor Announcement Bar With a Sticky Header: Stack or Swap on Scroll
Plenty of sites carry two strips at the top of the page: a thin announcement bar with a sale, a shipping note or a cookie notice, and the main header with the logo and menu. Making just one of them sticky is easy. Making both behave properly when the visitor scrolls is where things go wrong. The bar covers the menu, the menu jumps up under the bar, or both disappear at once and the page loses its navigation.
This guide covers how to set up an Elementor announcement bar with a sticky header so that the two work as a pair. It uses the Multi-Sticky feature in Sticky Header Effects Pro, an add-on to the free Sticky Header Effects for Elementor plugin (more than 300,000 active installs). The settings and limits described here come from the add-on’s own controls and code.
Key Takeaways
- Multi-Sticky Coordination is a Pro feature that makes several sticky sections on one page work together instead of competing.
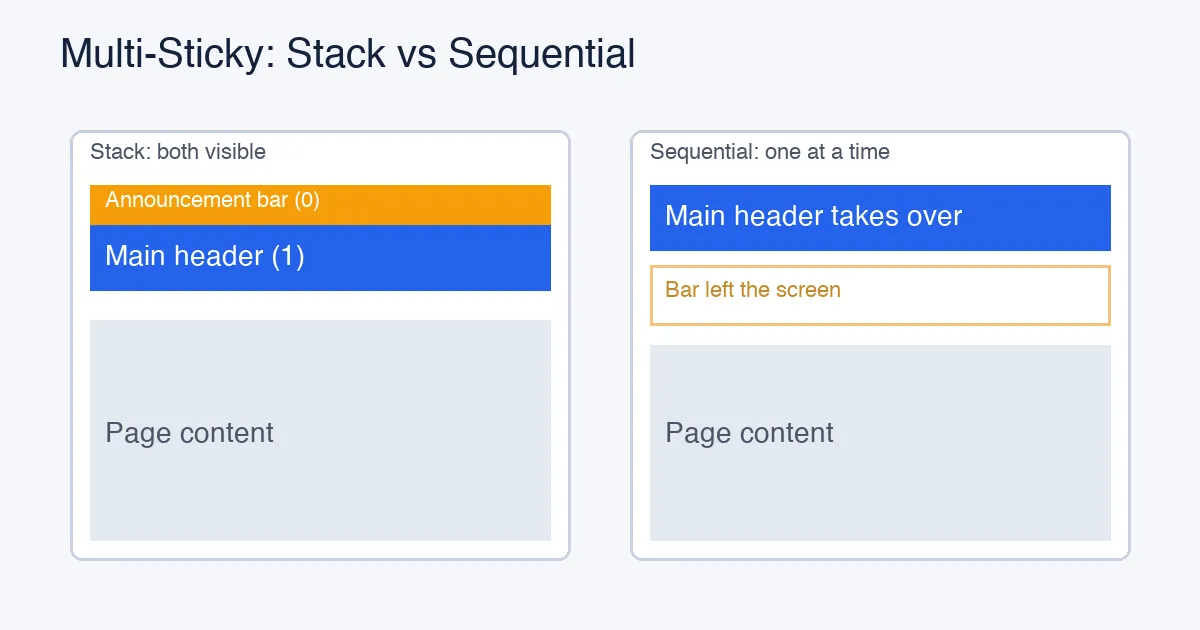
- There are two behaviors. Stack keeps every coordinated section visible, one below the other. Sequential shows one at a time and hands the top spot to the next section as you scroll.
- The Order / Priority number sets who comes first. The add-on’s own example is announcement bar = 0 and main navigation = 1.
- You can set the activation point by hand if a section sticks too early or too late, for example because of lazy-loaded images.
- A page can coordinate up to five containers. Anything beyond that is ignored.
- Each section needs the main Enable switch of the free plugin on, and its own Multi-Sticky switch on.
Why Two Sticky Elements Collide
A sticky element is told to stay at the top of the window. If two elements both get that instruction, they both aim for the same spot. Whichever paints last wins and the other hides behind it, or they overlap by a few pixels and look broken.
There is a second problem that is easier to miss. The sticky behavior in many setups relies on the element sitting inside a parent that is tall enough for it to travel. With Elementor Theme Builder headers, the header template often sits in its own thin wrapper, so a sticky element inside that wrapper has nowhere to go. That is why a second sticky bar can seem to work in the editor and fail on the live page.
Multi-Sticky avoids both problems in a direct way. According to the module’s own notes, it positions the coordinated sections with position: fixed instead of relying on the sticky mechanism, and it inserts a placeholder in the original spot so the page layout does not jump when a section leaves the normal flow. A script measures where each section naturally sits, decides which should be active, and recalculates on scroll, resize and load.
Stack or Sequential: Pick the Behavior First
Before touching any setting, decide what you want the visitor to see while scrolling. There are two honest answers, and they lead to different designs.
Stack
Every coordinated section stays visible at the top, each one placed below the combined height of those above it. This suits an announcement bar over a main menu when both matter all the time, for example a free-shipping banner that should stay in view on a store. The cost is screen space. Two strips fixed at the top of a phone screen can take a real share of the viewport, so keep them thin.
Sequential
Only one section is visible at any moment. When the next section reaches the top, the current one disappears and the next takes over, like a baton pass. This suits the common pattern where a promo bar is shown while the visitor is near the top of the page, then gives way to the main menu as they scroll down. You keep the message without permanently spending space on it.
A simple rule helps: if the bar is information the visitor needs while reading, use Stack. If it is a message you want seen on arrival, use Sequential.
Before You Start
- Build the announcement bar and the header as two separate sections or containers. They can be in the same header template or on the page, as long as each is its own element.
- Install and activate the free Sticky Header Effects for Elementor plugin and the Pro add-on with a valid license.
- Decide the order. The strip that should be at the top gets the lowest number.
If you are not sure how to build the header itself, start with the guide to editing a header in Elementor and then come back.
Step 1: Enable the Panel on the Announcement Bar
Click the section or container that holds your announcement bar. Open the Advanced tab and the Sticky Header Effects panel, and switch on Enable. This is the main switch, and Multi-Sticky controls stay hidden until it is on.
Step 2: Turn On Multi-Sticky Coordination
In the same panel, find the Multi-Sticky Coordination switch and turn it on. Three things appear: Behavior, Order / Priority, and a switch for setting the activation point manually.
- Set Behavior to Stack or Sequential, using the rule above.
- Set Order / Priority to 0. The lowest number is first: top position in Stack, and first to be shown in Sequential.
- Leave the activation point on Auto for now.
Step 3: Repeat on the Main Header
Click the section that holds your main menu and repeat the same steps: switch on Enable, switch on Multi-Sticky Coordination, choose the same Behavior, and set Order / Priority to 1. Set the same Behavior on both sections. If they differ, the section with the lowest Priority number decides the mode for the whole group, which is hard to spot while testing.
If the main header also uses effects from the free plugin, such as a shrinking logo or a changing background, they stay available. Multi-Sticky decides where the sections sit, and the other effects decide how they look. Our header shrinking guide shows how that part works.
Step 4: Preview on the Live Page
Open the real page in a private window. Scroll down slowly and watch what happens as the main header reaches the top. In Stack mode you should see the bar and the menu together, the menu directly beneath the bar. In Sequential mode the bar should give way to the menu without a gap or a jump.
Setting the Activation Point by Hand
By default each section becomes sticky automatically when its own natural position reaches the top. That works for most pages. It can go wrong when something above the section changes the page height after the first measurement, most often images that load late. The section then sticks a little early or a little late.
For that case, turn on Set Activation Point Manually and enter an Activation Scroll Distance in pixels. The section takes over at the top once the page has been scrolled that far. According to the add-on, this bypasses the automatic measurement completely, so lazy-loaded images above the section can no longer disturb the timing. The distance slider is responsive, which helps when a mobile layout has different heights.
A practical way to find the number: scroll the live page until the moment you want the switch to happen, read the scroll position with your browser’s developer tools, and enter it. Then test again at tablet and phone widths.
Recipes That Work
Promo Bar That Gives Way to the Menu
Announcement bar: Sequential, priority 0. Main header: Sequential, priority 1. A visitor arriving at the top sees the offer. After a short scroll the offer leaves and the menu takes the spot, so the page never carries two bars at once.
Store With a Permanent Shipping Notice
Announcement bar: Stack, priority 0. Main header: Stack, priority 1. Keep the bar to a single line of small text with a close-fitting height. Use the same background family for both so they read as one unit.
Header With a Secondary Navigation Row
The same logic applies to a header built in two rows, for example a logo row and a category menu row. Treat each row as its own section, give them priorities 0 and 1, and choose Stack so both stay visible. If you would rather swap the whole header for a smaller one on scroll, Header Replace on Scroll in the Pro add-on is built for that job.
Design Details That Matter
- Give each strip a solid background. In Stack mode, a transparent bar over a transparent menu produces unreadable text as content scrolls beneath. If you want the menu transparent at the top of the page, read our transparent sticky header guide and keep the bar solid.
- Keep the combined height reasonable. On a phone, two strips plus a browser toolbar leave little room for content.
- Mind the dropdowns. A dropdown menu opening from the main header must appear above page content. If it ends up behind something, see the fix for dropdowns behind content.
- Anchor links need an offset. With two strips fixed at the top, a jump link can land with its heading hidden. Our anchor links and sticky header guide explains how to correct the offset.
Limits to Know About
- A page can coordinate at most five containers. The script keeps the first five sorted by priority and ignores the rest, with a warning in the browser console.
- Every coordinated section needs the main Enable switch on. Multi-Sticky is a sub-feature of the Sticky Header Effects panel.
- Each coordinated section is set to position fixed and a placeholder holds its space. If you have custom CSS that targets your header’s position, test it, because the position will change while the section is active.
- Pro features need the free plugin installed alongside.
Troubleshooting
The Menu Hides Under the Bar
Check the priority numbers. The bar should have the lower number. Confirm both sections use the same Behavior, and clear all caches before testing again.
The Page Jumps When the Header Sticks
A jump usually means the placeholder height does not match the section. Look for margins, extra padding or hidden elements added to the section that change its height after load. Remove them or set the activation point manually.
A Section Sticks Too Early or Too Late
Turn on Set Activation Point Manually and enter the exact scroll distance. That removes the dependence on measurement.
Nothing Is Coordinated
Confirm both sections have Enable and Multi-Sticky Coordination switched on, that the Pro add-on is active with a valid license, and that you are testing the live page rather than the editor.
It Works on Desktop but Not on Mobile
Check whether the bar is hidden on mobile using Elementor’s responsive visibility. A hidden section cannot take part in the coordination, so the main header may then be in the wrong position. Read the mobile sticky header guide for the full checklist.
Frequently Asked Questions
Is Multi-Sticky Free or Pro?
It is a Pro feature. The free plugin provides the Sticky Header Effects panel and the Enable switch that it relies on.
What Is the Difference Between Stack and Sequential?
Stack keeps all coordinated sections visible, one under another. Sequential shows only one section at a time and passes the top spot to the next section as the visitor scrolls.
How Do I Decide Which Section Goes First?
Use Order / Priority. The lowest number comes first, so an announcement bar at 0 sits above a main menu at 1.
How Many Sticky Sections Can I Coordinate?
Up to five containers per page. Sections beyond that are ignored.
Can I Use This for a Cookie Notice?
A cookie notice is usually a popup or a fixed element from a consent plugin, not an Elementor section, so Multi-Sticky will not coordinate it. Position that notice at the bottom of the screen so it does not compete with the top strips.
Does It Work With Elementor Free?
Yes. The plugin works with Elementor Free or Pro. Whether your header is built from sections or containers, the controls appear in the same panel.
Why Did the Header Move After I Enabled It?
The coordinated sections are switched to fixed positioning while active, with a placeholder keeping their space. If a custom style on the header sets its own position, it may conflict. Remove that style and test again.
Suggested Reading
Want the sticky header without the code?
Sticky Header Effects for Elementor drops in as a widget. Free plugin, no account needed.